You can use Inline Junctions to connect 6" walls to 4" walls and doors in a horizontal or vertical run. After you import your DXF/DWG base plan, add your walls following the standard work flow. You can use the drawing tool, Edgewall, Center Wall, and Instawall to add your 4" and 6" walls. When you select a tool to add your walls, consider which Inline Junction you plan to use.
Centered Inline Junction
Centered Inline Junctions align and connect 4" and 6" walls at the i-Line. Select a tool that allowed you to draw your walls so that they line up and connect at the i-Line. You could use the drawing tool, Center Wall, or Edgewall to align the i-Lines.
This Way and That Way Inline Junctions
This Way and That Way Inline Junctions connect and align 4" and 6" walls so that the one side of the 4" wall is flush with the face of the 6" wall. As you add the walls, you can use the draw tool or Edgewall to ensure that the right face of the 4" wall lines up with the 6" wall face. However, if you don't get the alignment right while you are drawing your walls, you can also use the Align tool to change the alignment.
To Create a Run of 6" and 4" Walls
Before working with Junctions, take the following steps:
oTurn off Confirm.
oAdjust the Snap Strength to 0.5.
1.Import your DXF/DWG base plan, and use Edgewall, Center Wall, Instawall, or the drawing tool to add 4"and 6" walls to a run.
As you draw the walls, they may snap together and create intersections. However, to connect the walls you will also have to add Junctions to these connection points.
2.Confirm that the walls are aligned at the correct centerlines.
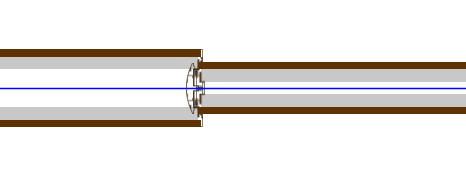
For Centered Inline Junctions, the wall i-Lines should be aligned, as shown in this image:
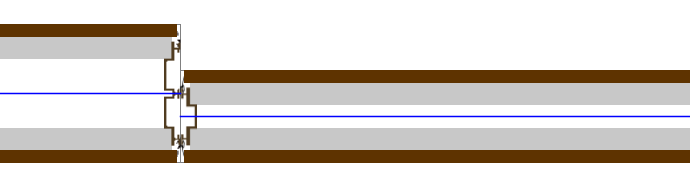
For This Way and That Way Junctions, one side of the 4" wall should be flush with the face of the 6" wall, as shown in this image:
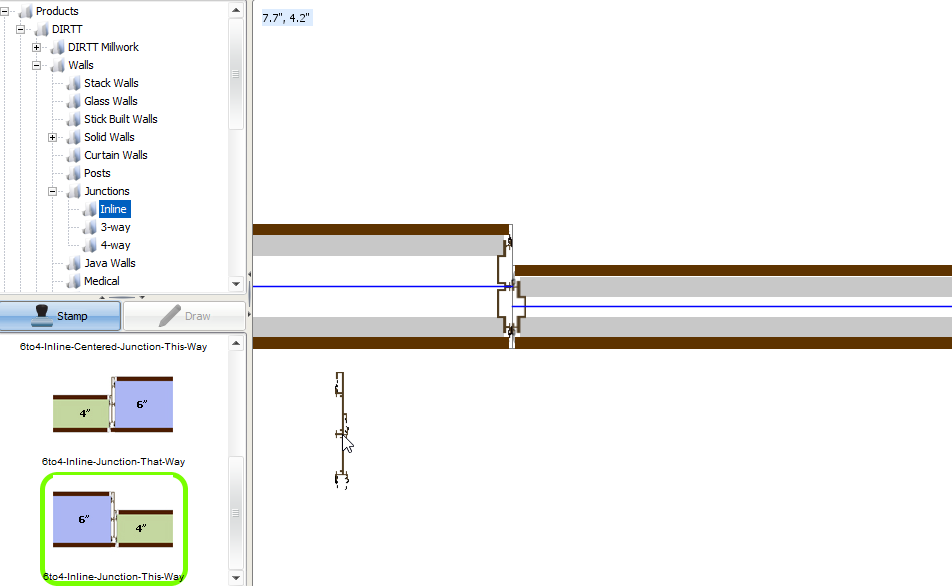
3.In the Product Palette, open the Inline folder in DIRTT/Walls/Junctions, and select the Inline Junction that matches your wall configuration.
4.Zoom in close to the walls where you want to stamp the Junctions.
5.Position the Junction between the 4" and 6" walls.
You see a preview of the i-Lines extending and snapping to the Junction, as shown in the image below:
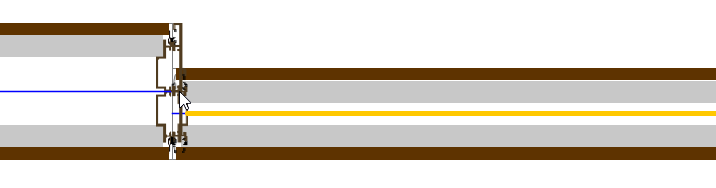
6.To place the Junction between the 4" and 6" walls, click.
The i-Lines snap to the Junction.

If one of the i-Lines does not snap to the Junction, Notification 635 appears. You can open the Junction Alignment Info dialog to see which i-Line is not connected.
7.If one of the i-Lines isn't correctly snapped to the Junction, pull it back and re-snap it.
8.Repeat steps 3-6 to place the Junction at the next point where 4" wall transitions to a 6" wall.
9.If you want to add a door to your run, select a 4" wall segment, and follow these steps.
Related Links:
•Using Inline Junctions to Add Doors to 6" Walls
•Using the Align Tool with an Inline Run
•Aligning a Wall to a Junction
Topic last updated on 3/16/2023.