On Stack wall and door styles, you can use the Ceiling Thief and Ceiling Antler drop ceiling support extrusions to accommodate different ceiling heights on different sides of a door or wall. On the side where you want a higher ceiling, you can specify the Ceiling Thief. On the side where you want a lower ceiling with, you can specify a Ceiling Antler.
Note: Ceiling support extrusions provide perimeter support for drop ceilings. However, they do not include drop-in ceiling tiles, t-bars, and other ceiling components.
To Specify a Ceiling Thief for Different Ceiling Heights
1.Right-click on a solid over Stack door or wall style style in the ICE Product Palette and select Edit Style.

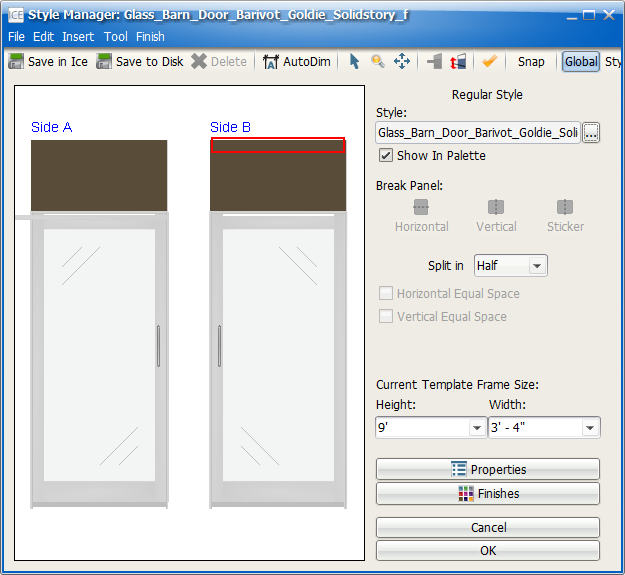
2. In the Style Manager, on the side of the door that accommodates the lower ceiling height, click the top extrusion of the solid Stack.
The top horizontal extrusion is selected on the side of the door that you clicked on. In this example image, the top horizontal extrusion for Side B is selected:

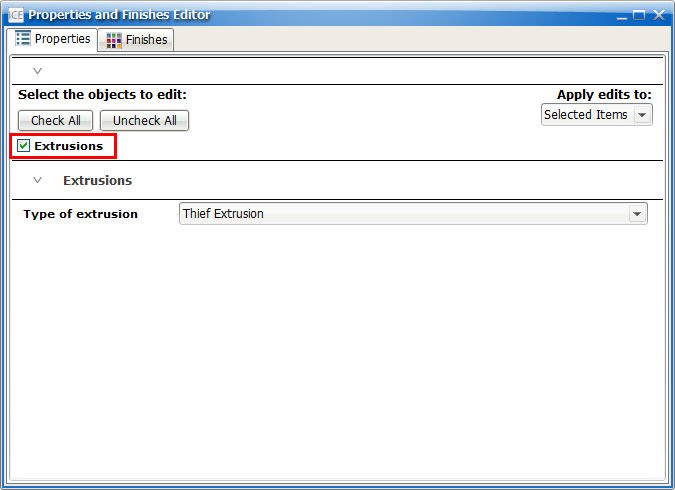
3.To open the Properties Editor, click Properties.
This image shows the Properties button highlighted:
4.In the Properties Editor, under Select the objects to edit, confirm that a check mark appears in the box beside Extrusions.
This image shows the Extrusions box with a check mark. The Extrusions section appears under Selections:
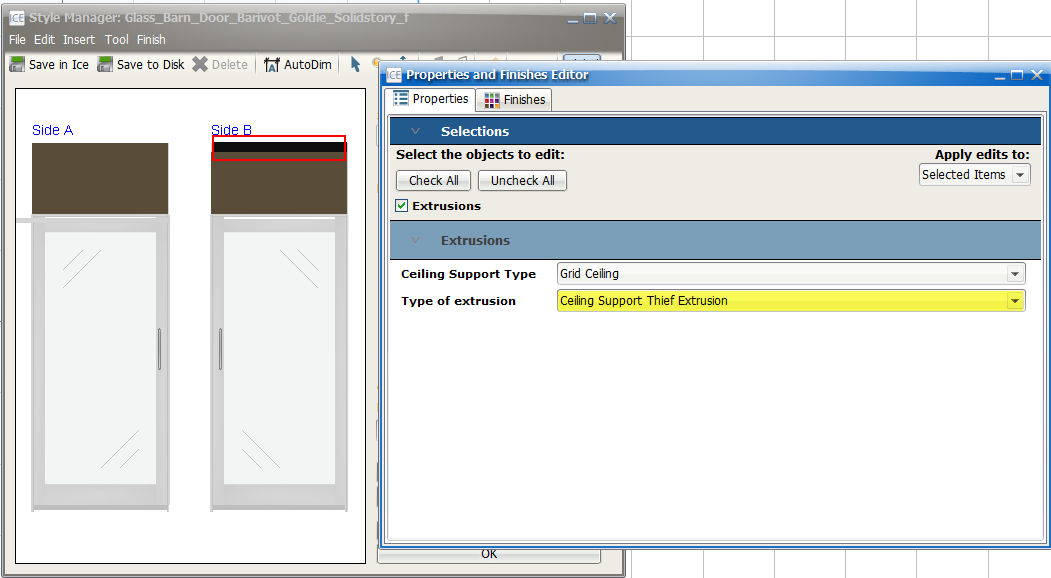
5.In the Type of extrusion menu, choose Ceiling Support Thief Extrusion.
On the side of the door style where you selected an extrusion, the extrusion updates. In this image, the Side B extrusion updates to a Ceiling Support Thief extrusion.
6.In the Style Manager, double-click the bottom horizontal extrusion for the stack wall.
Double-clicking selects the extrusion on both sides of the wall. This image shows the bottom horizontal extrusion selected.

Tip: If you are unable to select the correct extrusions when you double-click on one side (for example, Side A), try double-clicking the same extrusion on the other side of the door (for example, Side B).
7.To open the Properties Editor, click Properties.
8.In the Properties Editor, under Select the objects to edit, confirm that a check mark appears in the box beside Extrusions.
This image shows the Extrusions box with a check mark. The Extrusions section appears under Selections:
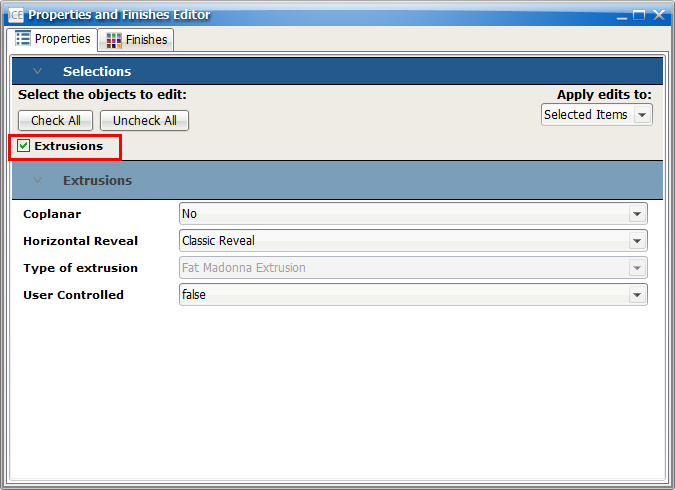
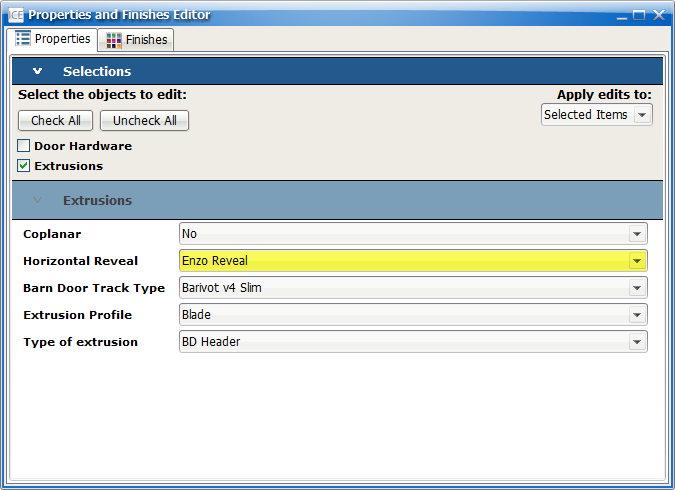
9.In the Horizontal Reveal menu, choose Enzo Reveal.
The Type of extrusion menu becomes available. This example image shows the selected Enzo Reveal and the available Type of extrusion menu:

10.In the Style Manager and single-click the bottom horizontal extrusion in the stack wall module faces the lower ceiling.
When you click on the bottom horizontal extrusion on one side of the wall, you select only the extrusion on that side of the wall. This image shows the lower horizontal extrusion selected on Side A:

11.To open the Properties Editor, click Properties.
12.In the Properties Editor, under Select the objects to edit, confirm that a check mark appears in the box beside Extrusions.
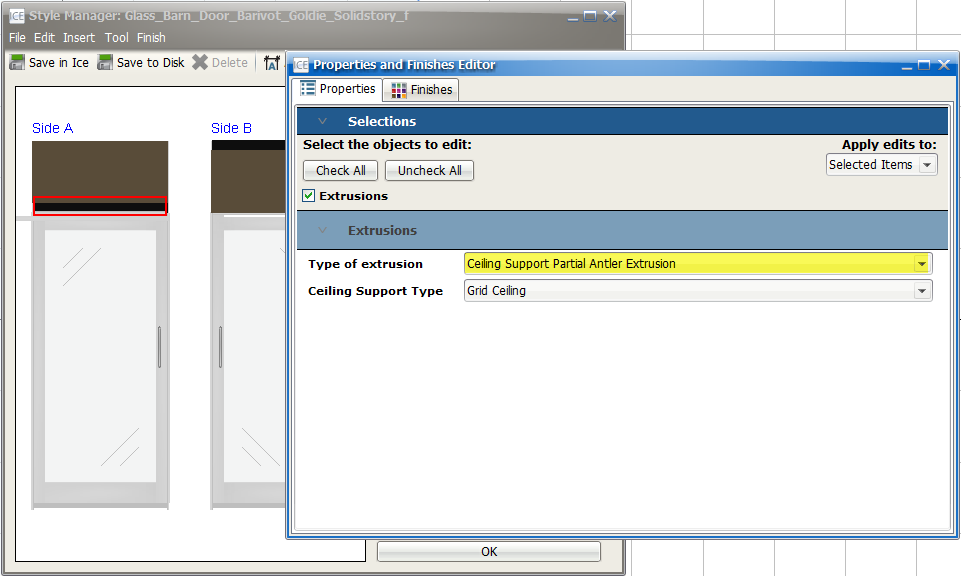
13.In the Type of extrusion menu, choose Ceiling Support Partial Antler Extrusion.
Your door style updates on the side where you selected the lower horizontal extrusion. This image shows the updated door style and Ceiling Support Partial Antler Extrusion selected in the Properties Editor:
14.In the Style Manager, click the tile on the side of the door that faces the lower ceiling height.
In this example, we click the tile on Side A. Side A is the side of the door that where we just changed the lower horizontal extrusion on the stack tile to a Ceiling Antler:

15.To open the Finishes tab in the Properties and Finishes Editor, click Finishes.
This image shows the Finishes button in the Style Manager:
The Finishes tab opens in the Properties and Finishes Editor.
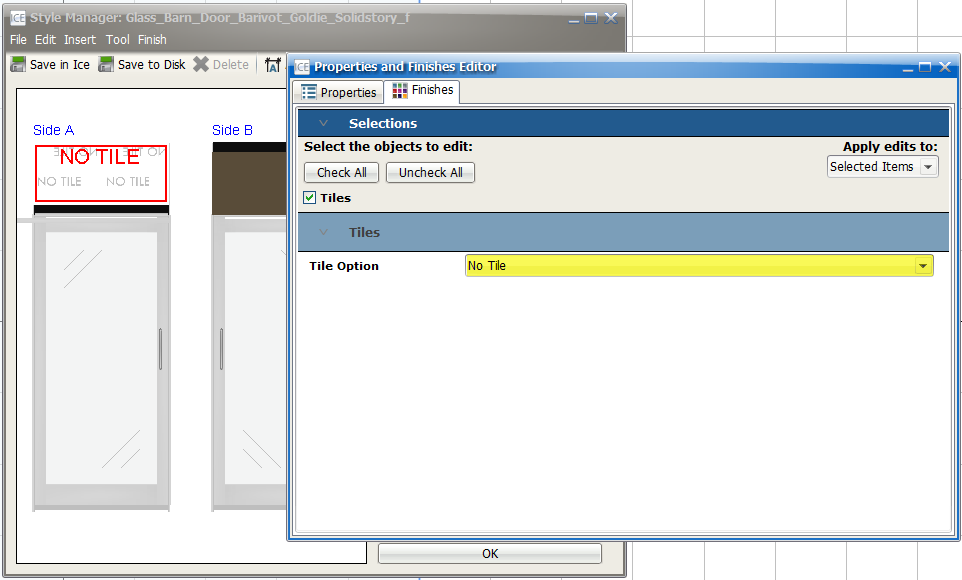
16.Under Select the objects to edit, confirm that a check mark appears in the box beside Tiles.
This image shows the Finishes tab open and a check mark in the Tiles box:

17.In the Tile Option menu, choose No Tile.
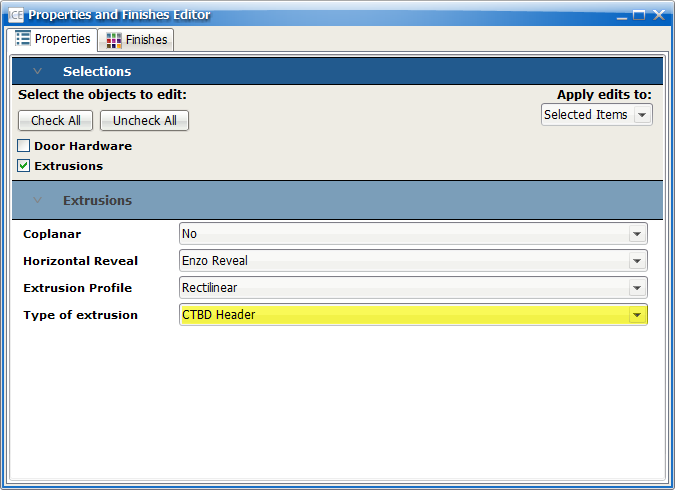
17.If you are are specifying a Barn door for different ceiling heights, and the lower Ceiling Support Antler is on the same side of the wall as the Barn door track, in the Style Manager, click the door header extrusion on the side of the door that has the Barn door track.
This image shows the door header extrusion selected on Side A, the side of the wall that has the Barn door track:

a.Click Properties to open the Properties Editor.
b.Under Select the objects to edit, confirm that a check mark appears in the box beside Extrusions.
This image shows a check mark in the Extrusions box:
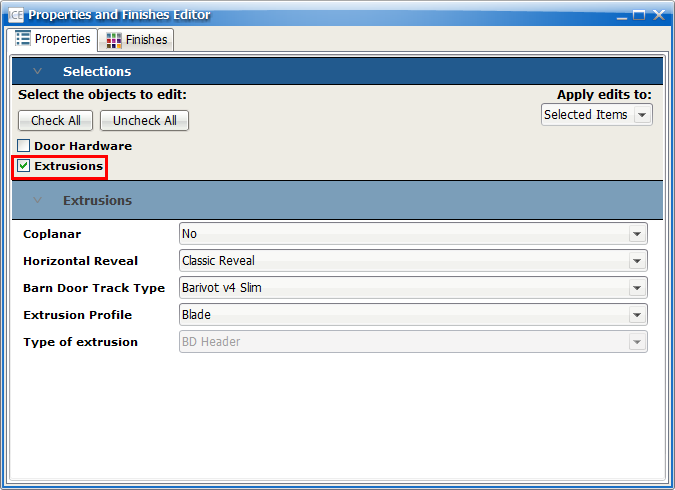
c.In the Horizontal Reveal menu, choose Enzo Reveal.
d.In the Type of extrusion menu, choose CTBD Header.
18. Once you finish creating your style, save it in the the Style Manager, and it appears in the ICE Product Palette.
Related Links:
•Specifying a Ceiling Antler with a Stack Style
•Specifying a Ceiling Antler with a Non-stack Style
•Specifying a Ceiling Thief on a Solid over Solid Wall