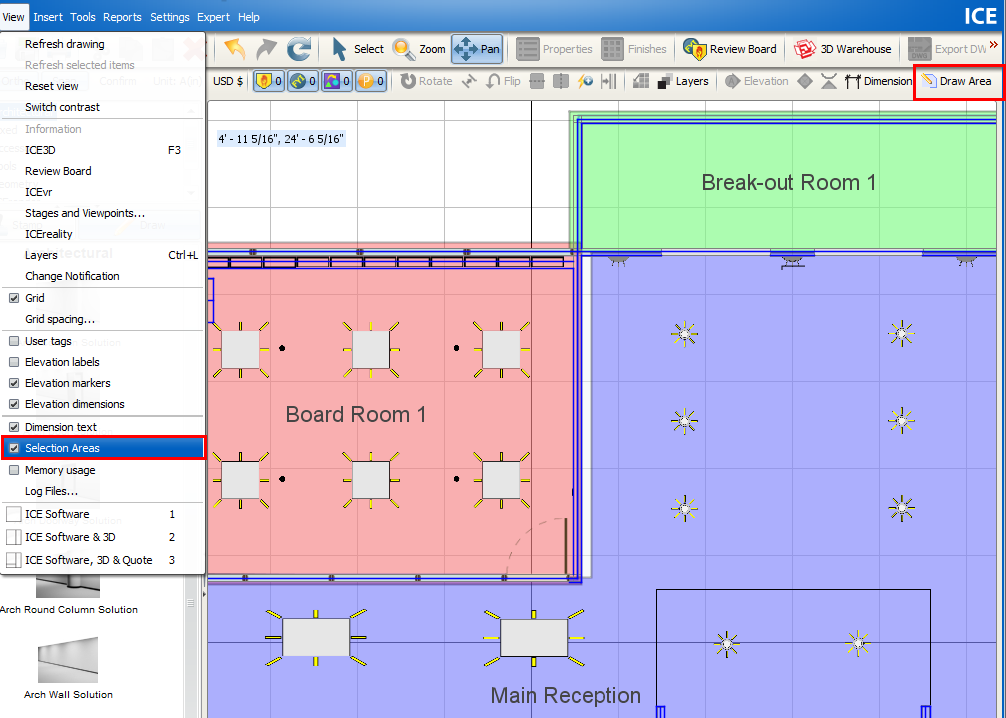
The Selection Area tool allows you to draw and specify a Selection Area in your layout. A Selection Area is specific region that you can use to select multiple items. Selection Areas behave exactly like box select and follow the same rules. For example, Selection Areas allow you to select everything that falls within or touches their bounds. If a layer is locked or not visible, a Selection Area cannot select the items that are on it.
However, Selection Areas have additional functionality that box select does not have. Selection Areas save with your ICE file so that you can use them again to select specific regions in your layout. Additionally, when you draw a Selection Area, you can define its size and shape. You can draw square, rectangular, or free-form Selection Areas. Once you draw a Selection Area, you can change its shape.
In ICE 2D plan view, Selection Areas appear as colored shapes with sequentially numbered names. The names and colors are automatically assigned. However, you can use the Properties Editor to customize the color and name information for your Selection Area.
This image shows Selection Areas in ICE 2D plan view. When a check mark appears beside Selection Areas in the View menu, existing Selection Areas appear in ICE 2D plan view, and the Draw Area tool appears on the ICE 2D toolbar, allowing you to create new Selection Areas.

Topics:
•Turning on/off Selection Areas
•Selecting Items in a Selection Area
•Modifying a Selection Area Shape