Once you specify Hidden Cornice Rail, you can choose the Hidden Cornice Rail Type. You can choose one option for the whole layout, or you can mix Hidden Cornice Rail options. If you combine a Low Profile Hidden Cornice Rail with low tiles with a High Profile Hidden Cornice Rail or a Low Profile Hidden Cornice Rail with tall tiles, you must increase or decrease the wall height for selected sub-walls so that the Hidden Cornice Rails align. You can use the vertical dimensions in your elevations to calculate The Wall Height increases and decreases.
To Mix Hidden Cornice Rail Types
Before you mix Hidden Cornice Rail Types, insert elevations so that you can use them as a guide.
1.To apply a different Hidden Cornice Rail Type to a sub-wall, select the sub-wall.
2.To open the Properties Editor, click Properties on the tool bar, or right-click and choose Properties.
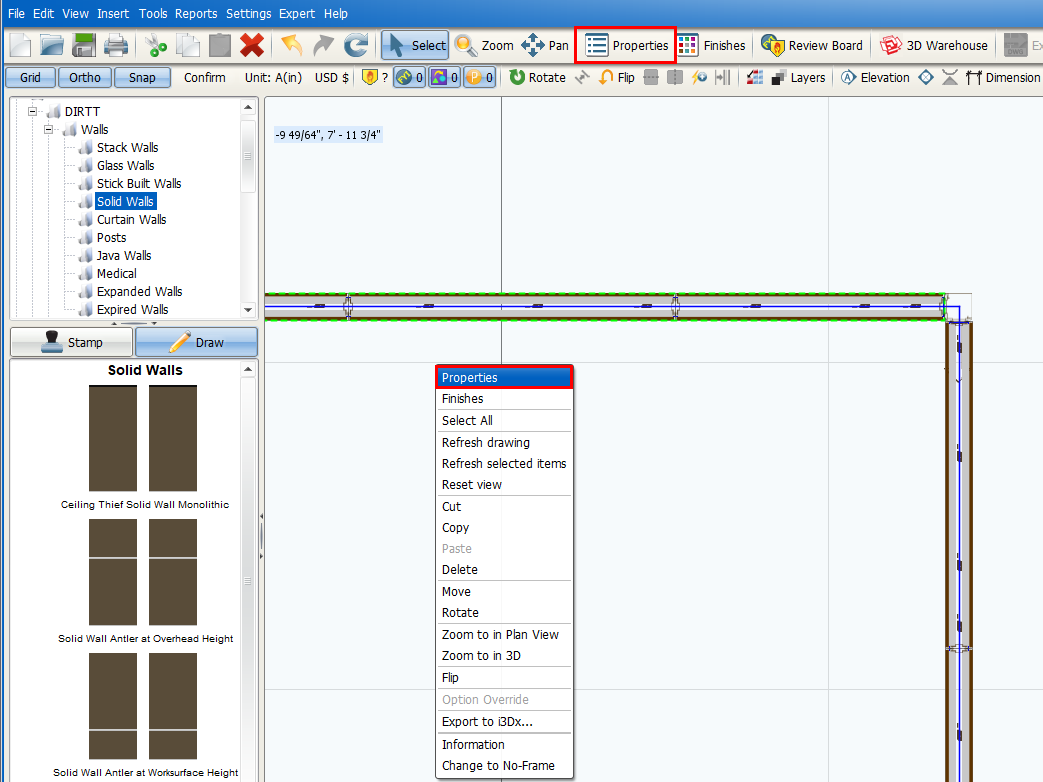
The Properties Editor opens.
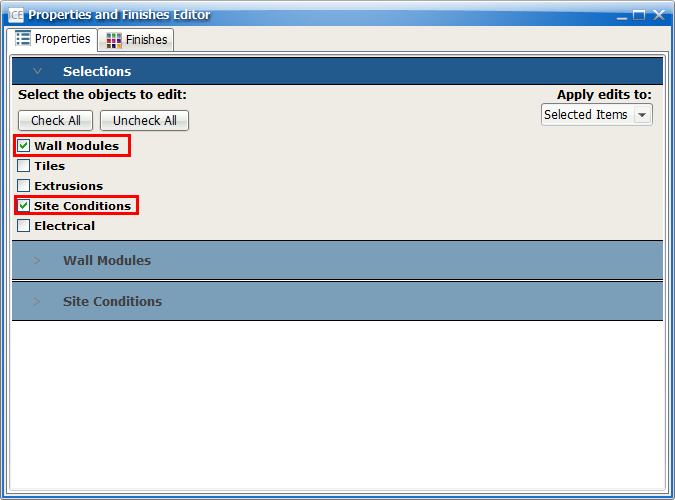
3.Under Select the objects to edit, confirm that a check mark appears in the boxes beside Site Conditions and Wall Modules.
In this image, a check mark appears in the boxes beside Site Conditions and Wall Modules, and these sections appear in the Properties Editor:
4.Under Site Conditions, find the Hidden Cornice Rail Type property.
Once you choose Hidden Cornice Rail as the Ceiling Condition, the Hidden Cornice Rail Type property appears, as shown here:
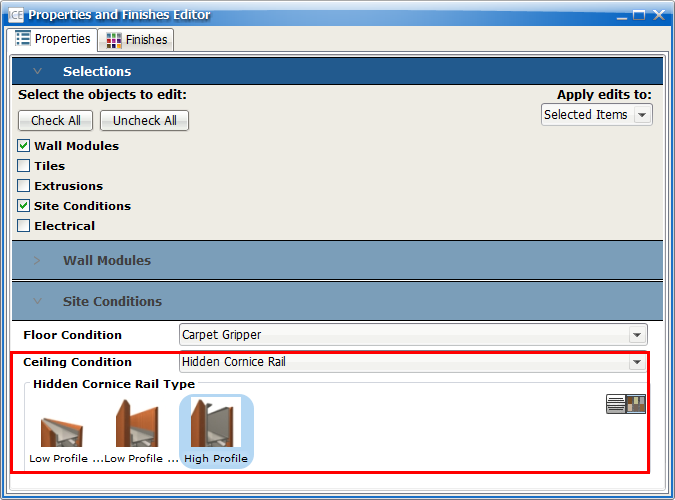
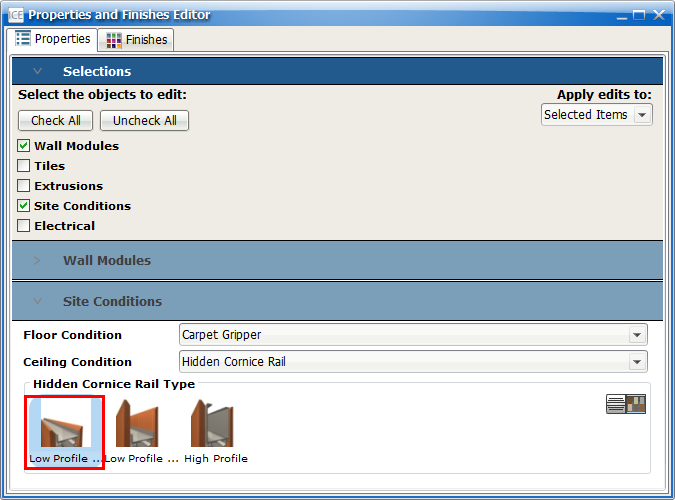
5.Under Hidden Cornice Rail Type, click the Hidden Cornice Rail profile that you want to apply to your sub-wall.
In this example, we select, Low Profile Short. This profile is a Low Profile Hidden Cornice Rail with short tiles:
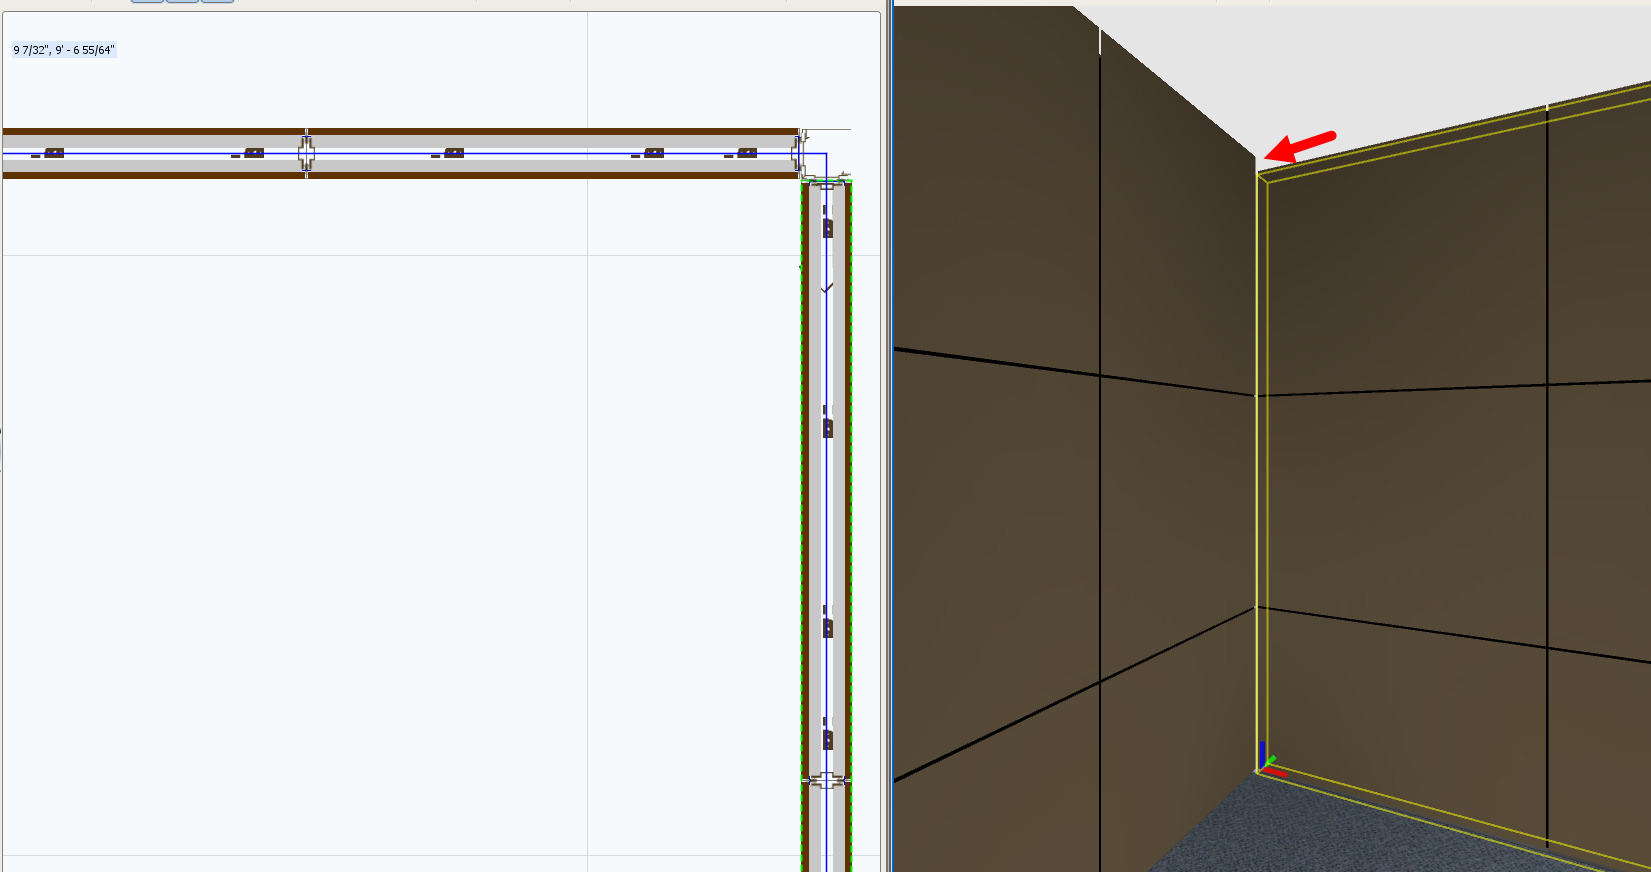
In ICE 3D, the selected wall updates to show the new profile. In this example image, the selected wall is Low Profile Short. Since the Low Profile Short Hidden Cornice Rail is shorter than High Profile, the selected wall is shorter:
6.If you need to adjust the Wall Height for one of the sub-walls, look at your elevations to calculate the difference in height.
This example image shows two elevations with wall height dimensions highlighted yelshort and Hidden Cornice Rail height dimensions highlighted green. In the elevations, wall heights are the same. However, the Hidden Cornice Rail heights are different:
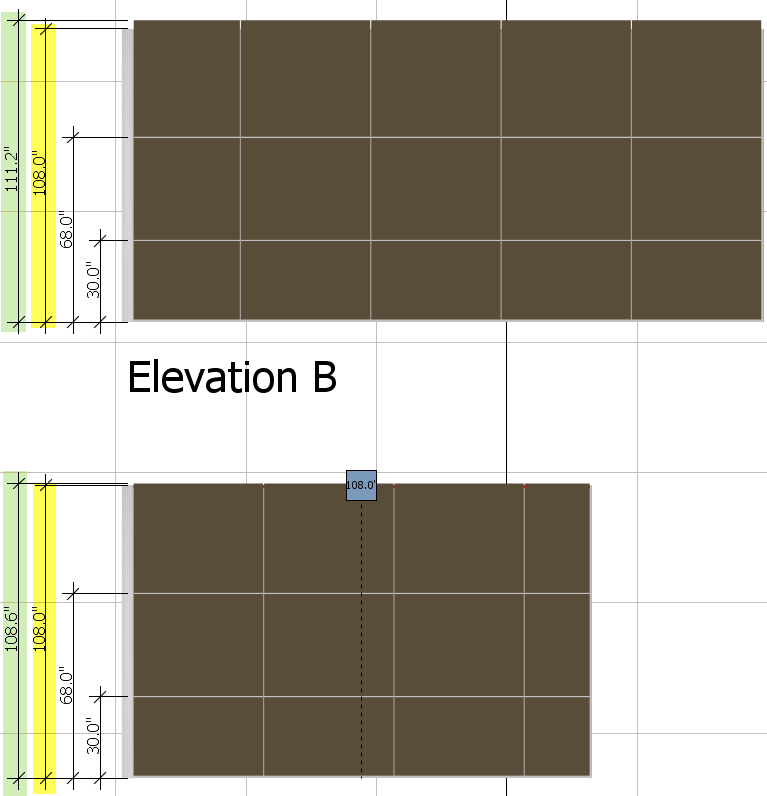
We can use the information in these elevations to calculate the difference in height:
a.Subtract the height of the Low Profile Cornice Rail with short tiles from the height of the High Profile or Low Profile Hidden Cornice Rail with high tiles:
•From the example image: 111.2” - 108.6” = 2.6”
b.If you want to increase the height of the sub-wall with the Low Profile Hidden Cornice Rail with short tiles, add the height difference to the Wall Height.
•From the example image: 108” + 2.6” = 110.6”
c.If you want to decrease the height of the sub-wall with the High Profile or Low Profile with high tiles Hidden Cornice Rail, subtract the height difference from the Wall Height for that sub-wall.
•From the example image: 108” - 2.6” = 105.4”
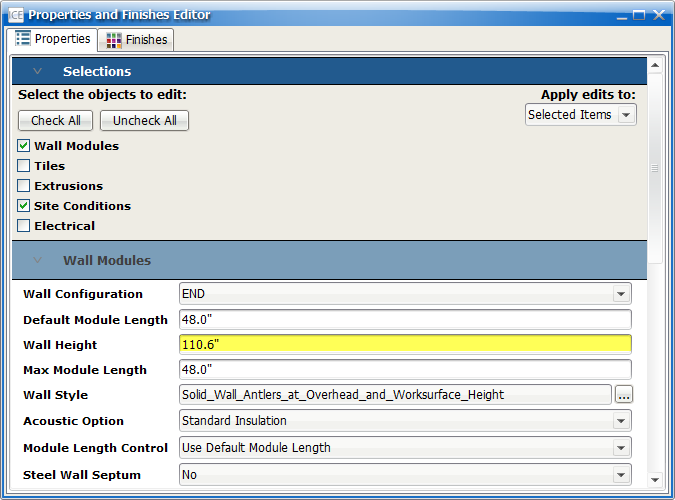
7.In the Properties Editor, under Wall Modules¸ click the Wall Height field.
8.Type the new value for the Wall Height.
In this example, we increase the Wall Height of the sub-wall with a Low Profile Hidden Cornice Rail with short tiles:
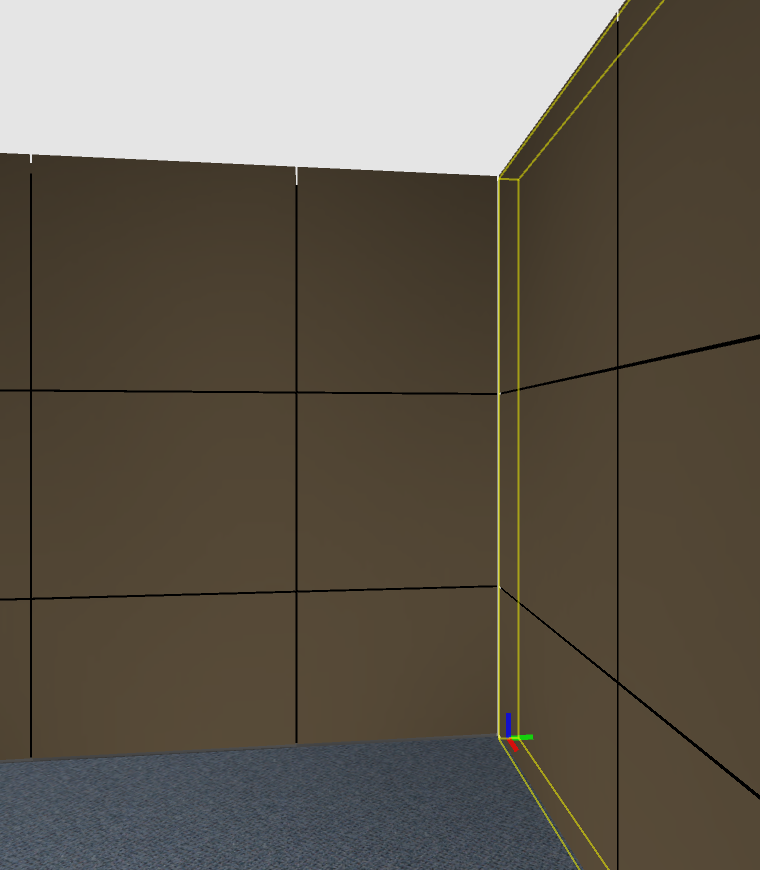
The sub-wall updates in ICE 3D so that it is the same height as the adjacent wall(s):
Related Links:
•Specifying Hidden Cornice Rail
•Showing and Hiding Top Tile Dimensions for Low Profile High Hidden Cornice Rails