A dedicated photo printer used in conjunction with high quality photo paper is recommended for printing renderings. In general, the better the printer, the better the printed rendering.
The following are settings that can be adjusted before printing a rendering:
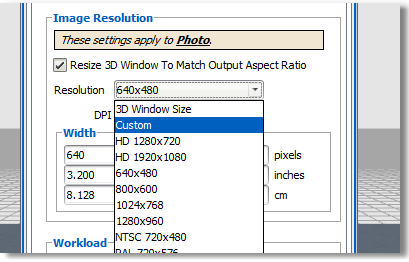
•Resolution: In the 3D window, go to Render Styles, then Photo Style Settings, then click the tab for Result Image. In the Resolution drop-down, change the size that best fits the size of the printing paper. The Custom sizes are recommended.
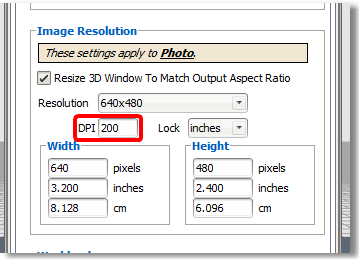
For example: If you would like to create an 8”x10” rendering, choose “Custom” from the Resolution drop-down menu, keep 200 marked in the DPI field, and type 10 in the Width inches field, and type 8 in the Height inches field. Notice how the pixels values are updated automatically to meet the requirements of the 8”x10” rendering.
•DPI: In the Result Image tab, 200 to 300 is recommended for printing. Higher values decrease the amount of pixilation in the image. While the rendering time could be longer as the DPI is increased, the result is a crisper, more detailed image.
|
|