When you start ICEcad, you can browse to an AutoCAD drawing to link your ICE file to. Once you choose this drawing, it opens on the ICEcad tab in AutoCAD. This drawing is then saved with your ICE file.
To Start ICEcad and Linking to an Existing Drawing
1.Open ICE, and load the ICE file that you want to link to AutoCAD.
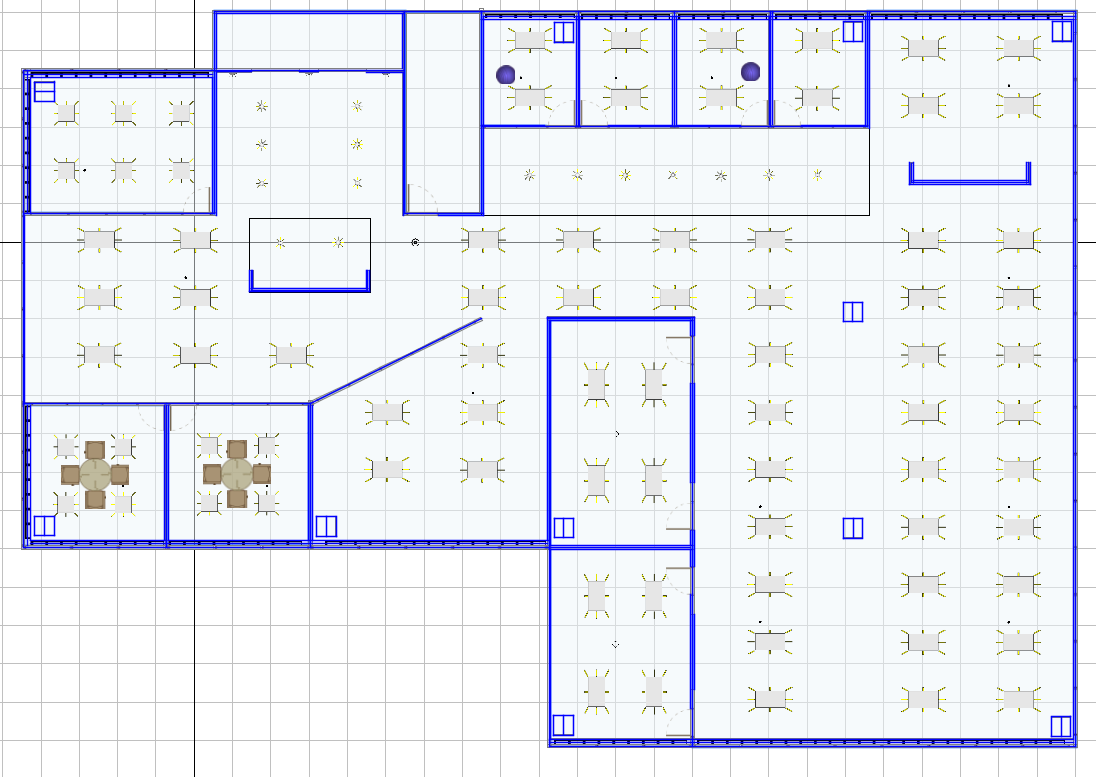
Your ICE file opens. This example image shows a layout in ICE 2D plan view:
2.Open a compatible version of AutoCAD.
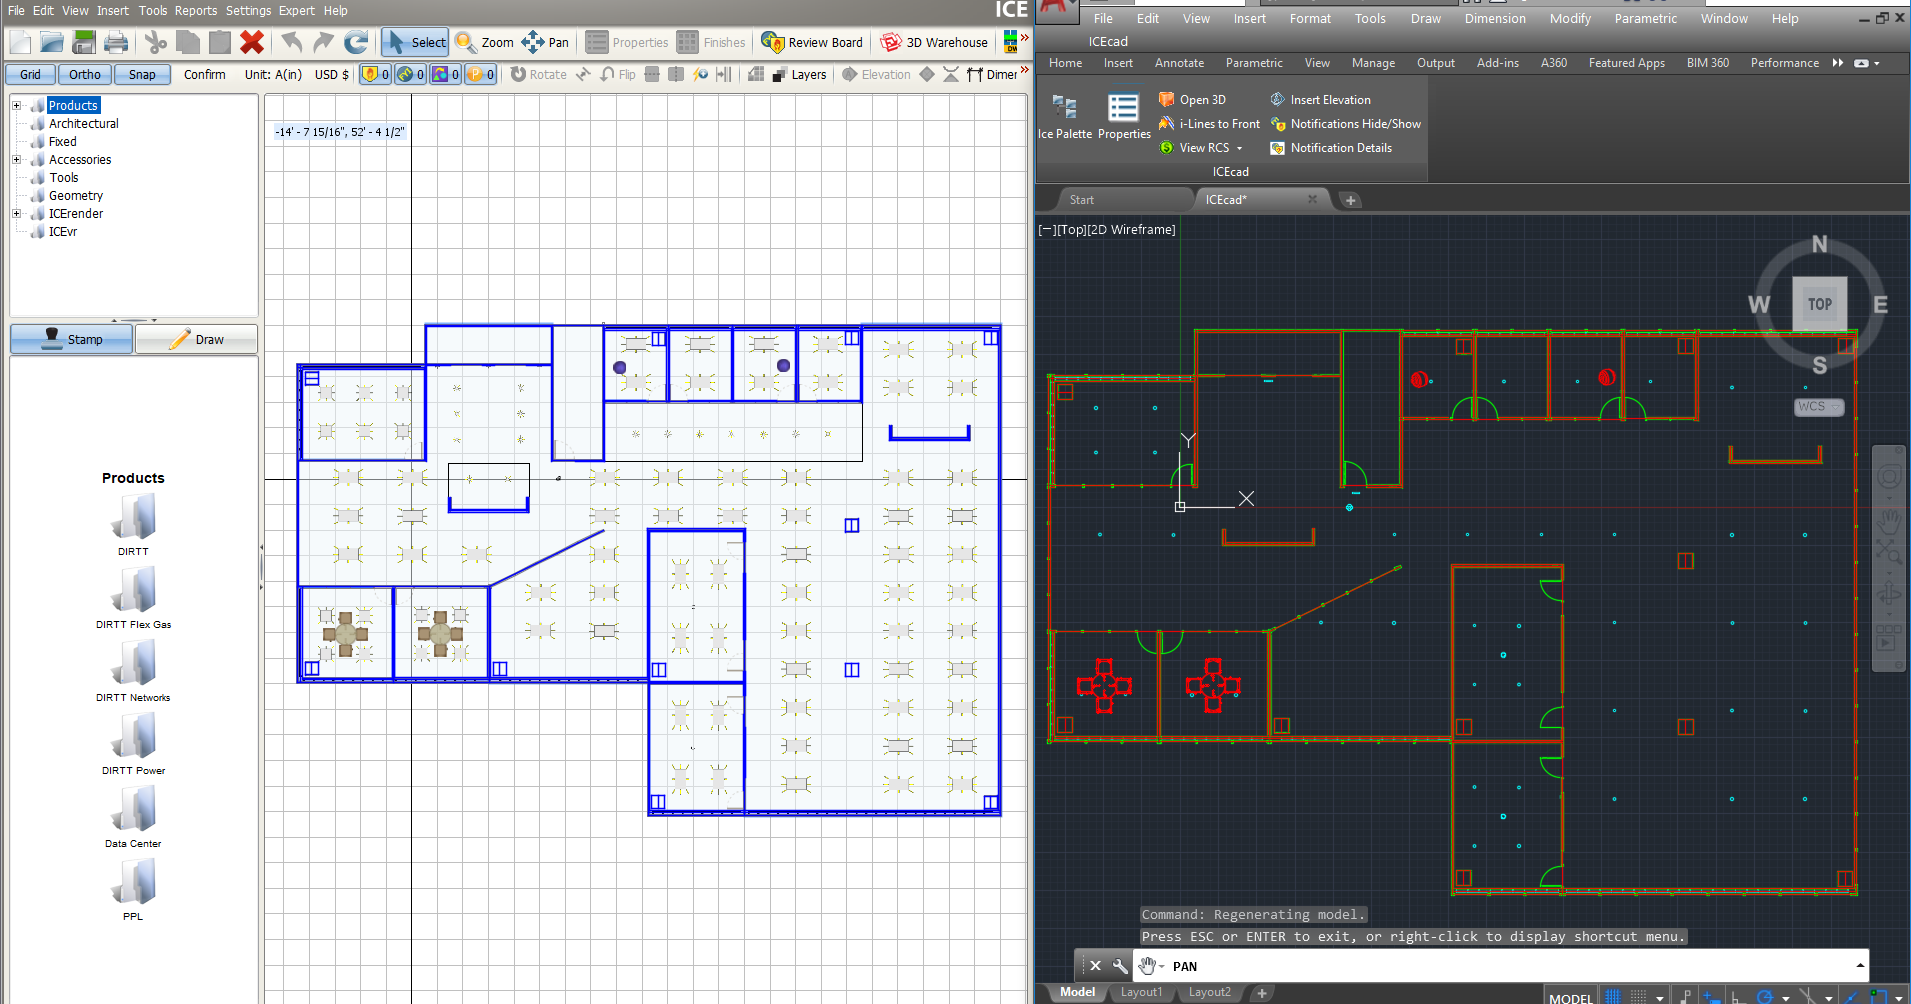
3.If you want ICE and AutoCAD to appear on the same screen, re-size the windows and place side-by-side.
This example image shows how you can create a split screen with ICE and AutoCAD to enhance your ICEcad work flow:
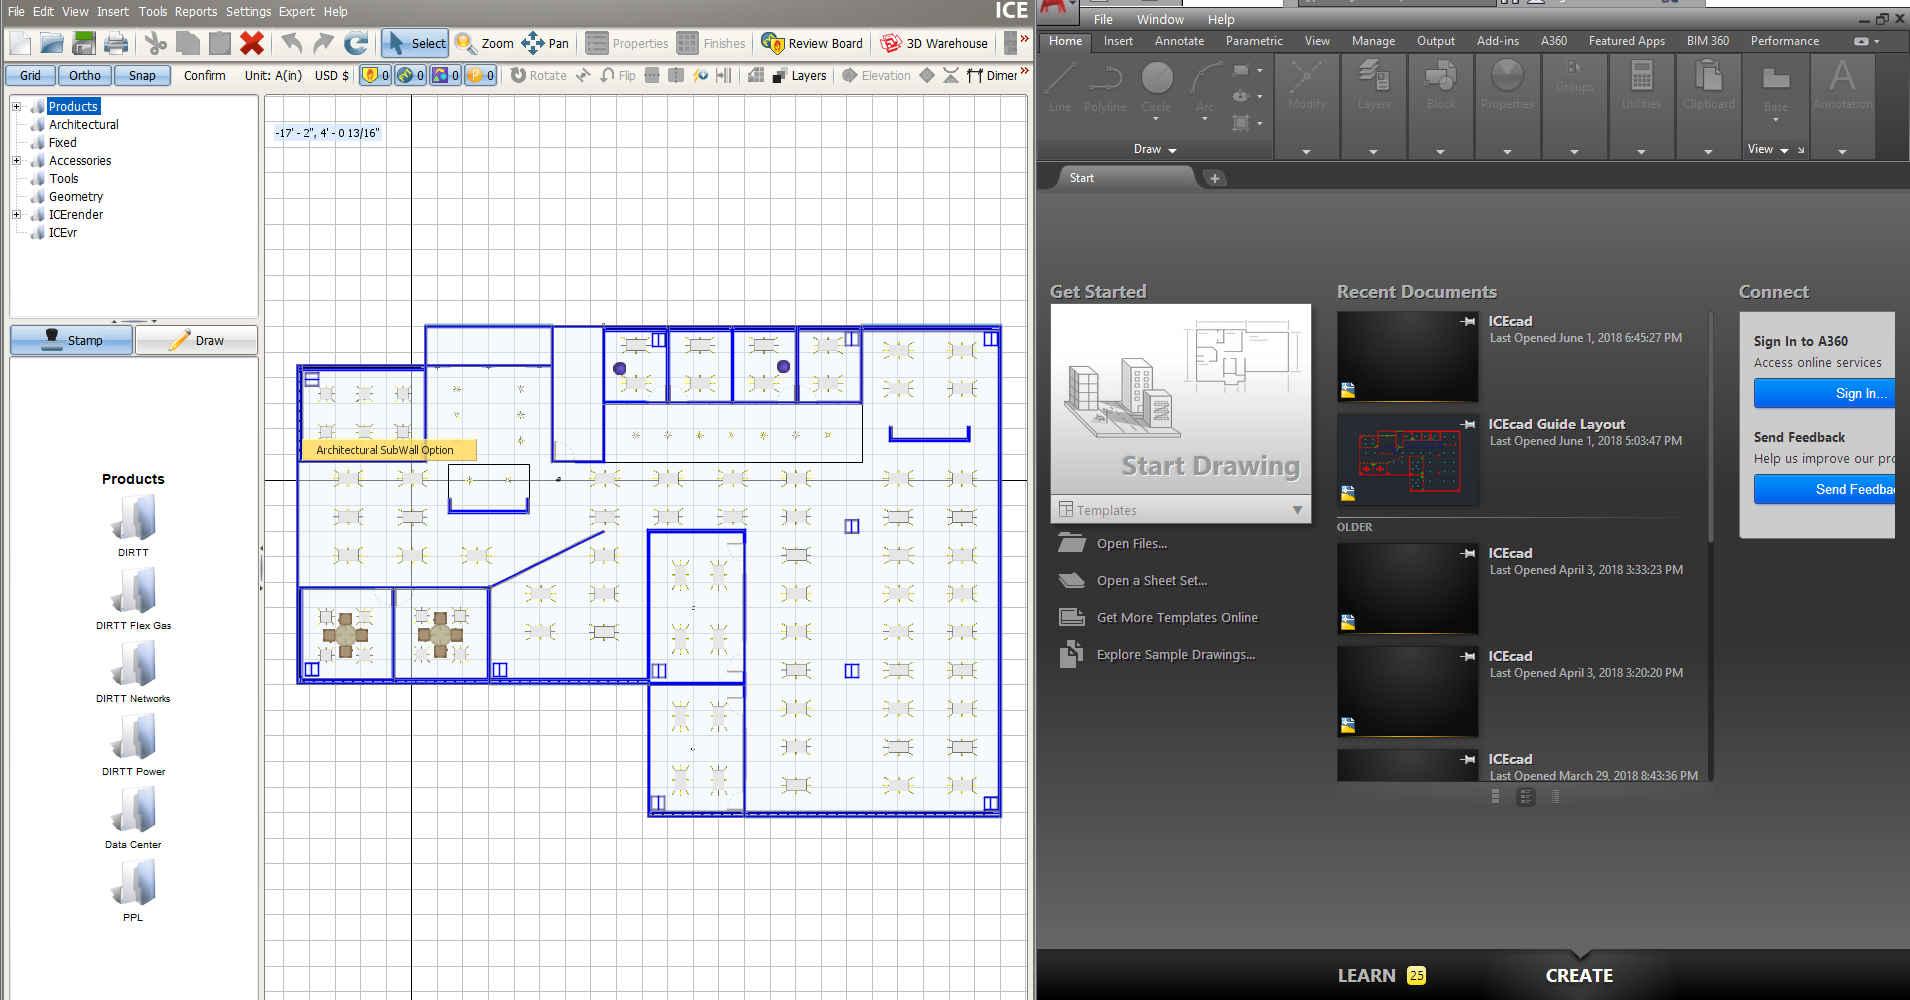
4.To link ICE and AutoCAD, on the ICE 2D plan view primary toolbar, click the Start ICEcad icon.

In AutoCAD, the Link to an AutoCAD Document dialog appears.
Tip: If you re-size the ICE 2D plan view window and no longer see the Start ICEcad icon, click on the arrow on the far right side of the toolbar, and choose Connect to DWG.

5.In the Link to an AutoCAD Document dialog, click Browse to a Drawing.
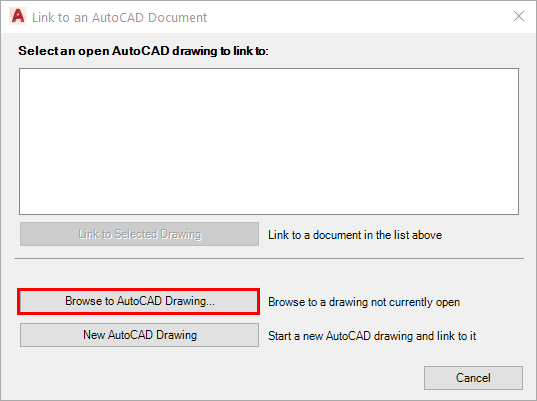
The Select File dialog box appears allowing you to navigate to the AutoCAD drawing that you want to link to your ICE file.
6.In the Select File dialog box, choose an AutoCAD drawing, and click Open.
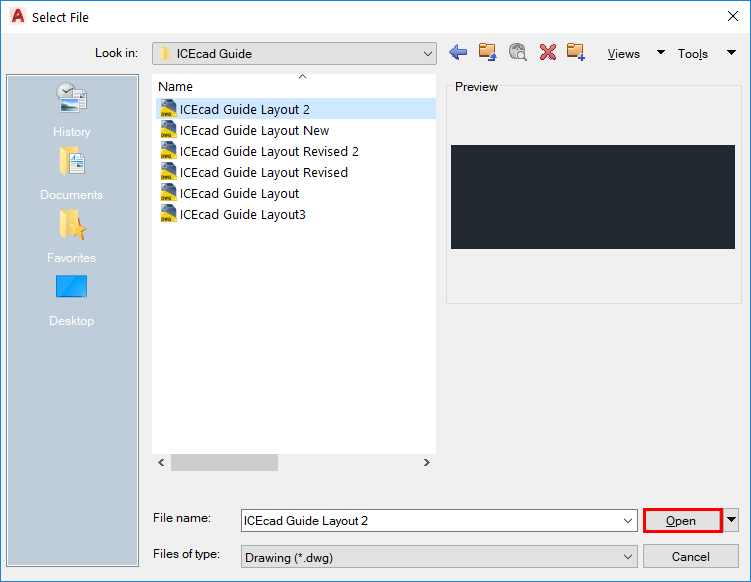
In AutoCAD, your ICE layout opens on the ICEcad tab, as show in this example image:
On the ICEcad tab, you can use the ICEcad toolbar and the ICEcad menu to access ICE functions in AutoCAD. This image shows the ICEcad ribbon and menu:

Once you link ICE and AutoCAD, you can start working with your ICE layout in AutoCAD. Whether you make changes in ICE or AutoCAD, the file automatically updates in both places.
Related Links:
•Starting ICEcad and Linking to an Existing Document
•Updating an Existing ICEcad Drawing
Topic last updated on 3/16/2023.