Enhance (and correct) glass tiles exported from ICE to Revit.
What are we talking about:
When you convert an ICE file to the Revit format, glass doesn’t always appear as it should. Glass tiles sometimes appearing incorrectly or appear solid walls.
What's in it for you?
•Fix Glass Panels that appear solid in Revit
•Enhance the look of glass in Revit
How You Do It:
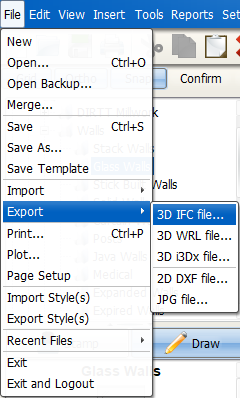
1.To export your ICE file to the IFC file format, in the ICE 2D File menu, choose Export-> 3D IFC.
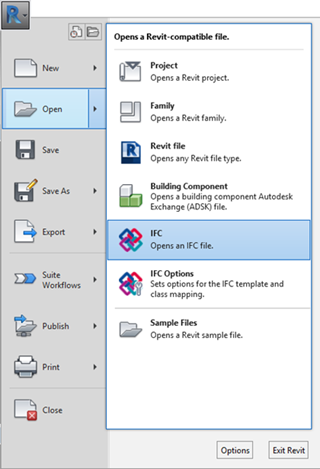
2.In Revit, open the IFC file by going to File-> Open-> IFC.
3.On the View tab, and click 3D view.

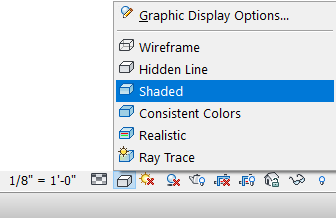
4.On the lower toolbar, click the Visual Style icon.

5.To improve appearance, choose Shaded.
6.To adjust glass transparency, choose the Manage tab, and click Materials.

7.To adjust glass transparency, choose the Manage tab, and click Materials.
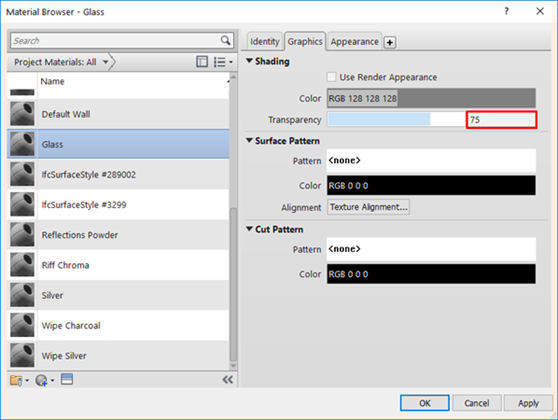
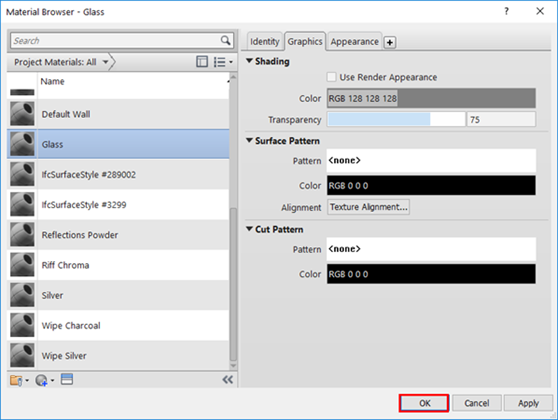
8.In the Material Browser, find the glass material in the list.
9.Click on the Transparency box, and type a new value.
In this example image, we changed the Transparency to 75:
10.Click OK.
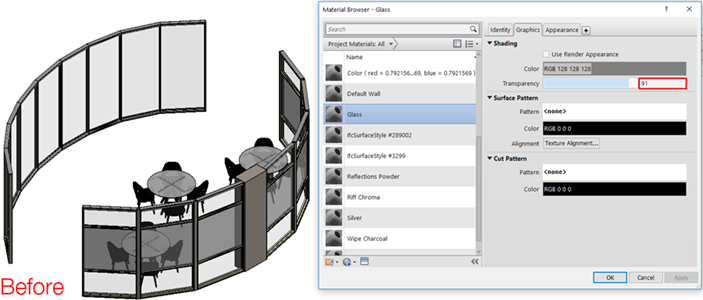
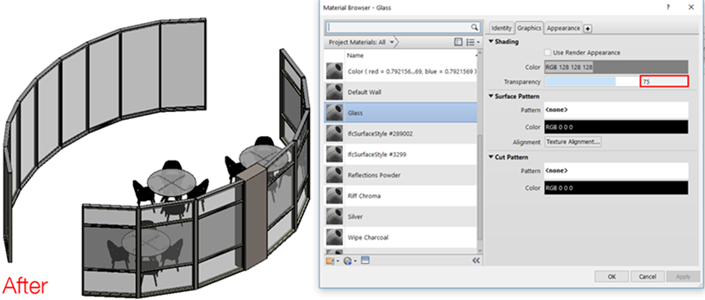
These example images provide a before and after view of glass transparency in Revit, changed from 91 to 75:
Advanced ICEtip:
Give your Revit file a cleaner look by removing line edges.
1.On the bottom toolbar, click the Visual Style icon.

2.Choose Graphic Display Options.

3.In Graphic Display Options, uncheck Show Edges.
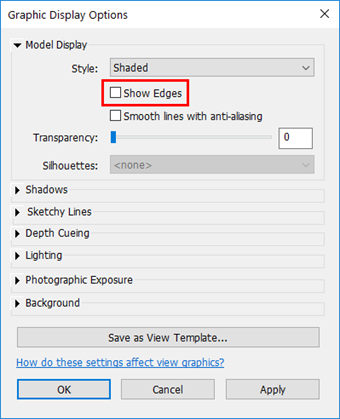
4.Click Apply and then OK.
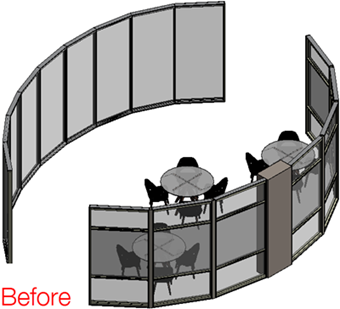
This "before" imagebelow shows how a Revit file looks with Show Edges turned on:
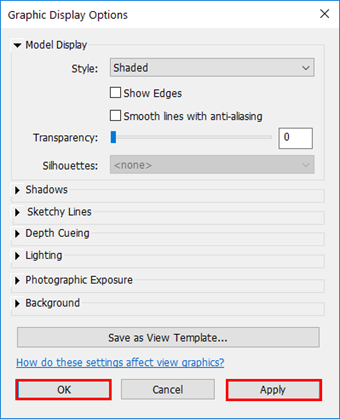
5.Click Apply and then OK.
This "before" image below shows how a Revit file looks with Show Edges turned on:
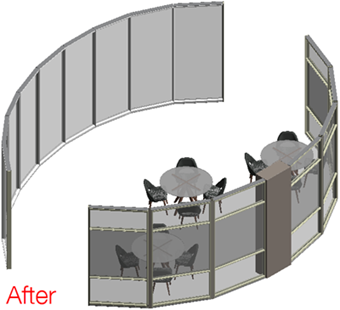
This "after" image shows how the same file looks with Show Edges turned off:
Related Links:
•Export to 3D IFC
Topic last updated on 8/31/2023.