Use Snap Lines to create multiple wall heights in ICE.
What's in it for you:
Using Snap Lines to adjust wall heights gives you:
•Flexibility when drawing layouts with multiple ceiling heights •Increased control over i-lines and elevations
How you do it:
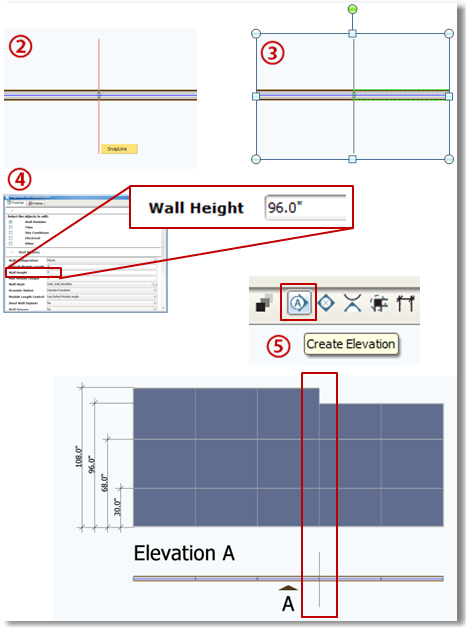
1.Draw a wall in ICE 2.Add a Snap Line, intersecting the wall at a 90 degree angle where you'd like to change the ceiling height 3.Left-click twice on the side of the wall whose height you want to adjust (so it's highlighted in green) 4.Go to "Properties" and change the wall height in the editor 5.Highlight the whole wall (in yellow) and create an Elevation to show the height change in a single Elevation
Advanced ICEtip:
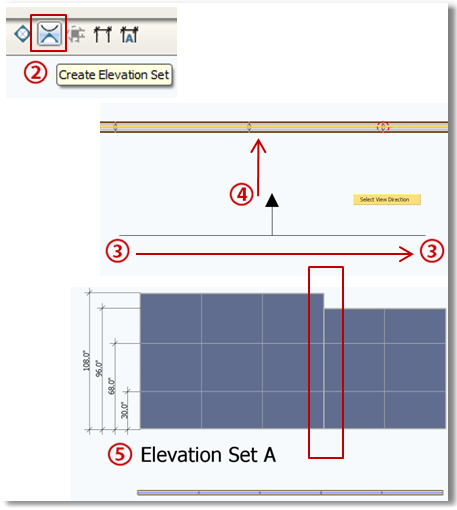
If you have to draw the walls as separate i-lines, you can still show them in a single Elevation using the "Create Elevation Set" command:
1.Highlight both i-lines 2.Click the "Create Elevation Set" icon on the ICE2D tool bar 3.Draw a plane parallel to the wall 4.Then select the direction (presumably TOWARDS the walls you selected) 5.Select location for your Elevation Set |
|