When using a lot of Custom Items, organize them visually for your 2D view.
What are we talking about:
We often use Custom Items to add as much realism as possible to our ICE layout. By color-coding the various Items we can differentiate between them to help us identify them easily in the 2D window.
What's in it for you:
•Visually organize your 2D view so it is easier to work with when using many Custom Items •Make the 2D view more presentable when demonstrating ICE in front of clients •Note for DIRTT Casework users: since casework items are already color-coded in 2D, this "tip" is extra beneficial in visually organizing your 2D view.
How you do it:
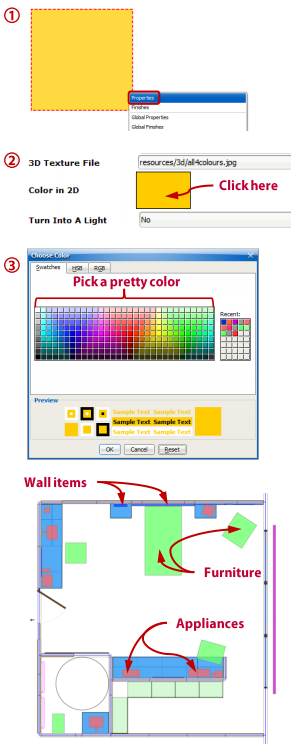
1.Highlight a Custom Item and go to Properties 2.Click on the yellow box next to "Color in 2D" 3.Select a color to represent that Custom Item
Advanced ICE tips: •Color-code your Custom Items by room, area, or type. For example: Wall-hanging items (like pictures or flat screen tv's) are blue, tabletop items (like appliances, vases, books) are red, plants are green, etc. •To group items with the same color, after you have selected the color for one Custom Item, CTRL-select the other Custom Items to be grouped and either: oIn Properties change the Apply edit to option to Same Attributes and pick your color, or; oAfter Step 2 above, on the Swatches tab, your most recent color selections are shown on the right. Click the recent color of your choice.
•In some cases you may want your Custom Items to display on top of other items in your layout (appliances on top of casework for example). In the Layers dialog box (CTRL-L), move the "Custom Items" layer up in the list until they display as desired. •This 2D color-coding does not affect how the Custom Item appears in 3D. |
|