DXF or DWG files are often the starting point for creating client layouts in ICE. As standard practice, you should import these files directly into ICE using the Import DXF/DWG wizard.
However, there are times when the DXF or DWG files supplied to ICE users are large, unorganized, have unnecessary information in them or are even corrupt, all of which leads to slow or decreased performance in ICE. Removing information you don’t need from your file before you start your work in ICE can decrease your DWG/DXF size up to nine times. By following these quick steps you will save yourself time in the long run.
Quick Reference Checklist:
Use these steps as a guide, if you need further explanation, just click for more.
1.Determine the base units of the .DWG file by checking the scale it was drawn.
2.Check for X-Refs and Detach/Bind as necessary.
3.Highlight Blocks and Explode until there are no Blocks remaining.
4.Turn off all unnecessary layers.
5.Highlight everything and Copy with Base Point then Open a new, blank .DWG file (with no/blank Layout tabs) and Paste everything to the origin.
6.Run the AutoCAD Purge command until fully purged.
7.Run the AutoCAD Audit command until error-free.
8.Save as .DWG.
9.Open ICE and Import the .DWG.
Instructional Video How To:

How to Clean DWG Files:
Note: AutoCAD command prompts are shown in [box brackets]. Keyboard shortcuts are shown in {curly brackets}.
Step 1
Open the DWG file in AutoCAD, and determine the base units. This can be done by checking the scale to confirm dimensions scale 1-to-1 or by measuring that a doorway is ~ 36”.
Step 2 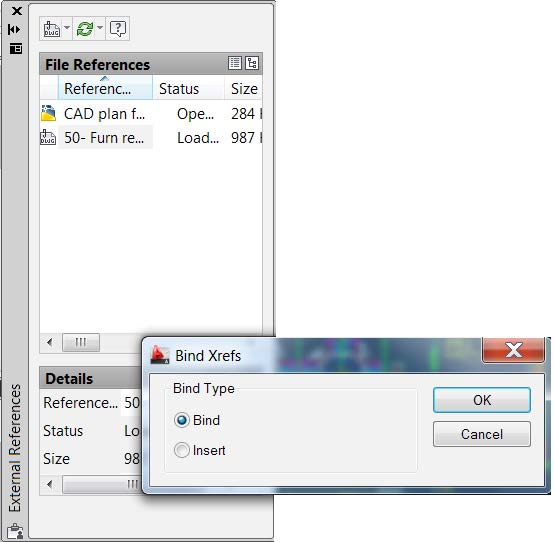
Go to the Insert Tab and open the Reference Screen or type [xref] to determine if any External Reference files are associated with the DWG. If no X-Refs exist, skip to Step 3.
Determine whether the X-Refs contain necessary information based on whether you need to bring the information into ICE to complete the project. If it does, click “Bind” (if the X-Ref does not contain important information, click “Detach”). You are then prompted to either “Bind” or “Insert." These have to do with how AutoCAD treats the layers being bound into the file. Since layer control is not critical for our DWG in ICE, either option is fine (selecting “Insert” creates less layers and a slightly smaller file size).
Binding turns the X-Ref into a Block Reference with the same name. Repeat as required for each X-Ref. Once they are bound, each should be Exploded [explode].
Step 3
Explode the Block References remaining in the file.
A quick way to identify all the Block References in your file is to use the [Filter] command:
a.CTRL+A to select everything in the file
b.Type [filter] then ENTER in the command prompt to open the Filter dialog box.
c.Under Select Filter choose Block from the drop down list.
d.Click Add to List then Apply. This will highlight all of the Blocks in your file.
Other filtering tips include: 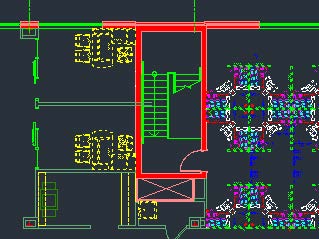
•Filter blocks and explode until there are none
•Filter attributes and delete
•Filter polylines and explode
•Check and filter for 3D things (like solids or mesh) and delete
Once all the Blocks are highlighted, use the [explode] command. If you file contains nested Blocks, you may need to [explode] several times to remove all the Blocks.
Note: If you plan on using the InstaWall or Center Wall commands in ICE, now would be a good time to check that elements in the file representing walls are actually “Lines” and not “Polylines”, which cannot be InstaWalled. Explode any Polylines you will want to turn into DIRTT walls.
Step 4
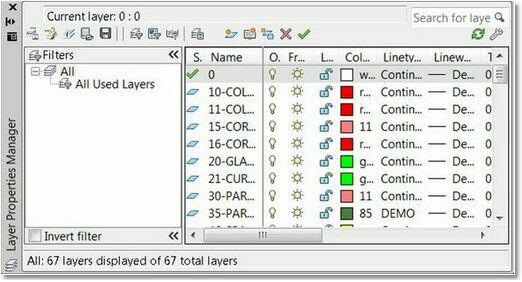
Open the Layer Properties Manager [layer] and check that ALL Layers are turned on and unlocked.
Okay, but what layers don't I need?
•Street maps
•Notes, Text
•Bathrooms, Sinks, Toilets*
•Furniture*
•Doors*
•Separate Multiple Floors
* Optional, if you need these to design in ICE, don’t turn them off, use your judgment - what will you actually need in ICE to draw from and use as reference?
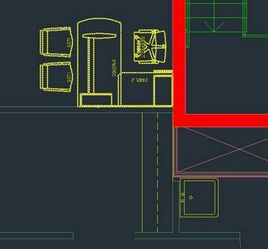
Start turning off any information that is not need in ICE by using the Express Tools Layoff button, or type [layoff], or the Layer Freeze button, type [layfrz].
Click each layer you want to turn off/freeze by selecting it in the file.
Step 5
Draw a selection box around the entire drawing and Copy-with-Base-Point {Ctrl+Shift+C}. When prompted for a base point, select a point in the lower left corner of the layout. Open a new blank file based on a template that has a completely empty Layout tab. Paste {Ctrl+V} it to the origin [0,0,0].
Note: If you are working on a project where the base plan might change over time and require reloading updated information, make sure you use the EXACT SAME base point each time.
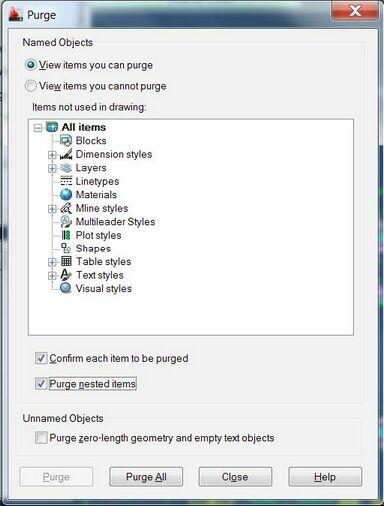
Step 6
Use the AutoCAD [purge] command to eliminate unused data from the file. Check both ‘Confirm’ and ‘Purge’ in the dialog box and select ‘Purge All.'
Step 7
Use the AutoCAD [audit] command to confirm there are no errors associated with the file. Enter [y]es when prompted to remove any errors.
Step 8
Save your new file as a DWG.
Step 9
In ICE, use the Import DXF/DWG Wizard to guide you through the importing process with options for scale, origin and layers. Best practice is to use the File Origin and Merge all Layers. Scale is at the user’s discretion.
From the Experts:
“Don’t start your ICE file without cleaning up your DXF or DWG, this will improve performance in ICE significantly.”
– DJ Rome, Support
“Use the Replace all DXF/DWGs function in ICE if your base plan changes. Don’t forget to clean the file in AutoCAD first.”
– Adrienne Banzhof, DIRTT Designer
“Remove all of your layout tabs that contain Title Blocks, etc. This will increase you ICE file exponentially if you import them.”
– Nazarene Patton, Support