You can set the size for each segment and module in a wall. Setting the segment size is useful when you design for designing walls with side lights.
To Change Segment Size in the Properties Editor
1.Select the segment.
2.Right-click and select Properties.
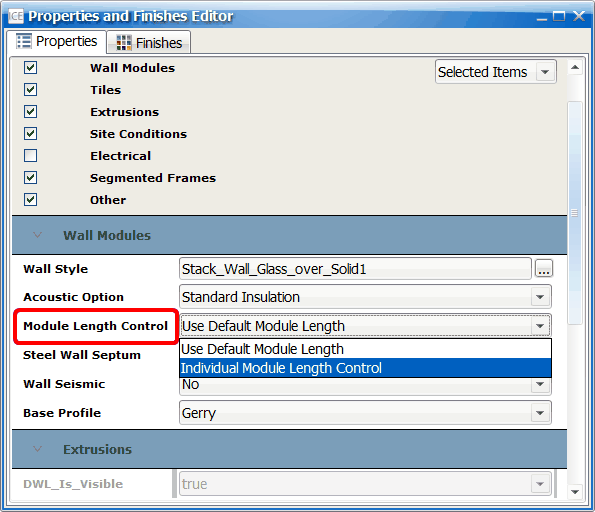
3.From the Module Length Control drop-down, change Use Default Module Length to Individual Module Length Control.
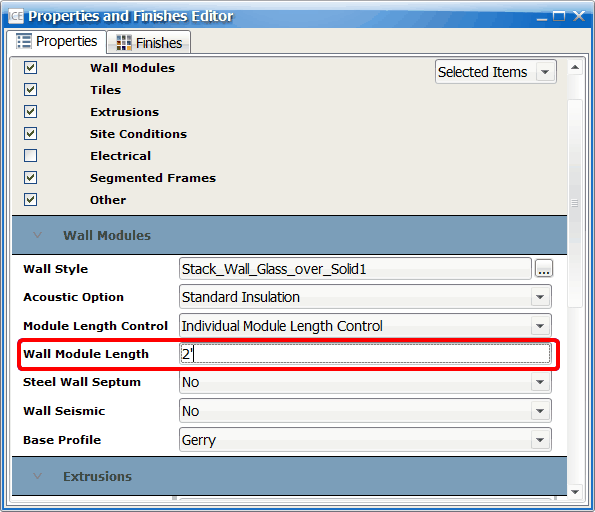
2.In Wall Module Length enter the desired length and press enter.
It is important to not set the size for all segments on a wall. There needs to be at least one to adjust for the small segment needed by the intersections and connectors.
Alternatively, you can change the size of a wall segment using the Confirm and Grip tools:
1.Turn on the Confirm function in the upper left of the ICE 2D window.
2.Hover over the wall segment you'd like to adjust.
3.Click on the segment until the outline turns red and blue grips appear. This signifies it has been individually selected.
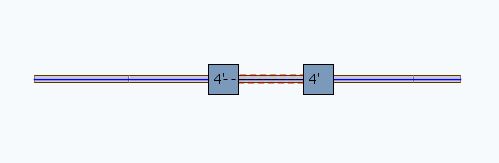
4.Click and drag a Grip so the displayed dimension is close to your final desired dimension.
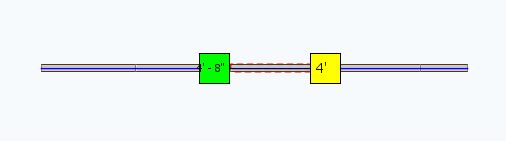
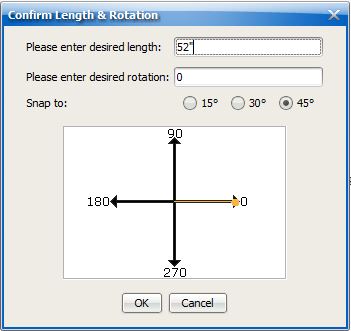
5.In the Confirm window that appears, enter your exact desired length and rotation and click OK.