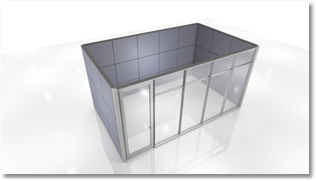
Create a quality rendering with an all-white background and save the settings to use later.
What's in it for you:
•Create a compelling visual that focuses on your wall/furniture solution. •Eliminate other aspects of your layout so your client won't get distracted from their solution. •Work less. No need to build contextual elements.
How You Do It:
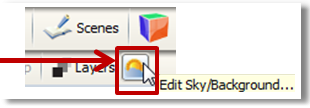
•Both the floor and the sky need to be set to white: •White Floor: Draw a floor much larger than your layout and choose "Custom Finish" from the finish editor. This will create a white floor to catch reflections •White Sky: Click on the "Edit Sky/Background..." icon: check the "Solid Color" option and choose white. This will make the scene in ICE 3D white-on-white as well.
Setting Up Your Layout to Render:
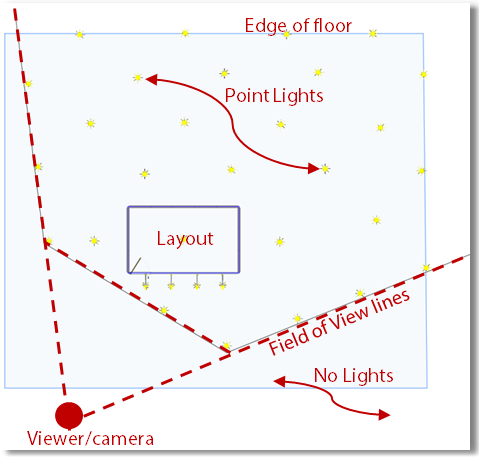
•All-white renderings work best with a small wall or furniture layout •Make sure your layout is well-lit, including the entire floor area in your view (don't light areas you can't see in your rendering) •Placing point lights around the edges of the floor will help hide the "seam" where the floor and sky meet (Looking down on the layout will also minimize any "horizon" that happens where floor and sky "meet") •Suggested Settings: oFX Finishes (if appl.) = ON oFloor Reflectivity = ON, between 25 and 50. oLights: ▪Shadow Type = Accurate ▪Shadow Quality = High ▪Shadow Softness = 3.0 ▪Cast Shadow = Yes oGlobal Illumination/Environment Light = ON oField of View: As necessary, between 70 - 90
Advanced ICEtip:
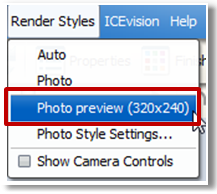
•Once the rendering looks good, in Render Style Settings click "Save Settings" to save these settings as a Preset for your next all-white rendering •Use Photo Previews often prior to doing a final rendering to save time: Render Styles » Photo Preview |
|


