How to add lights in key locations to fill out the lighting scheme in your renderings.
What's this all about?
Some ICErender users have a hard time lighting the ceiling. They have lit the "space" just fine but the ceiling appears too dark since no lights are shining upward and there's not enough bounce light reaching the ceiling. Here's a quick tip to add light to the ceiling.
What's in it for you?
•Better renderings! •More control over your lighting schemes.
How to:
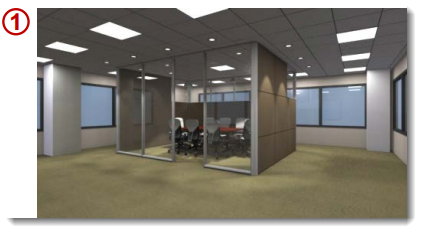
1.In this example rendering, the space appears adequately lit but the ceiling plane looks under lit.
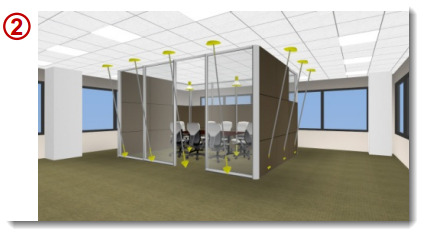
2.In this image of the 3D screen, all the User Lights represent actual lights and are pointed downward. This leaves it up to the Environmental Light and Global Illumination settings (which SHOULD be on) to light the ceiling. While Environmental Light can be increased, it's at the expense of adding more light to the entire scene, not just the ceiling.
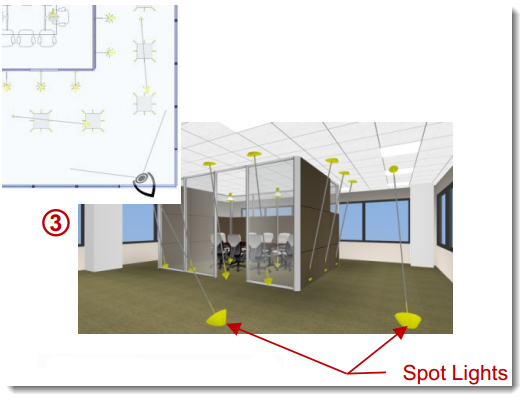
3.To remedy this, use a Spot Light as fill lighting, positioned low to the ground and pointing upward. Do not try to light the WHOLE ceiling in the manner! Usually the composition only requires it to be the ceiling areas closest to the camera.
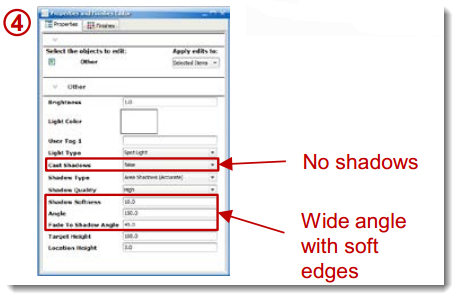
4.IMPORTANT: For more control of fill lighting, use these (or similar) Properties. It is critical to set Cast Shadows to FALSE since these are not representing actual lights and you do not want to add odd shadows to the rendering.
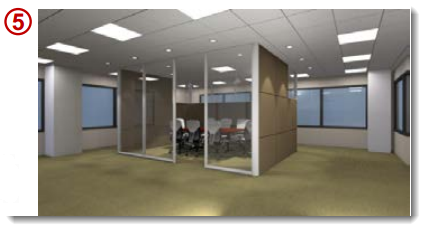
5.In this revised rendering, the added light on the ceiling plane helps to even out the image visually and puts the focus back onto the conference room; you know, that part you're trying to sell!
*Requires and ICErender license, contact sales@ice-edge.com for more information.
|
|