If the Visibility/Graphic Overrides options are greyed out, it is because the file has a View Template attached.
1.Navigate to the Properties Palette in Revit.
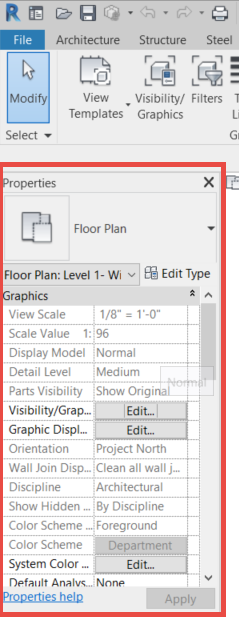
2.Scroll down until you see the View Template option located under the Identity Data subheading.
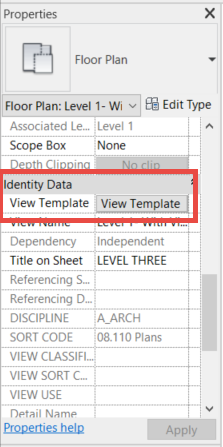
3.Click the View Template button.
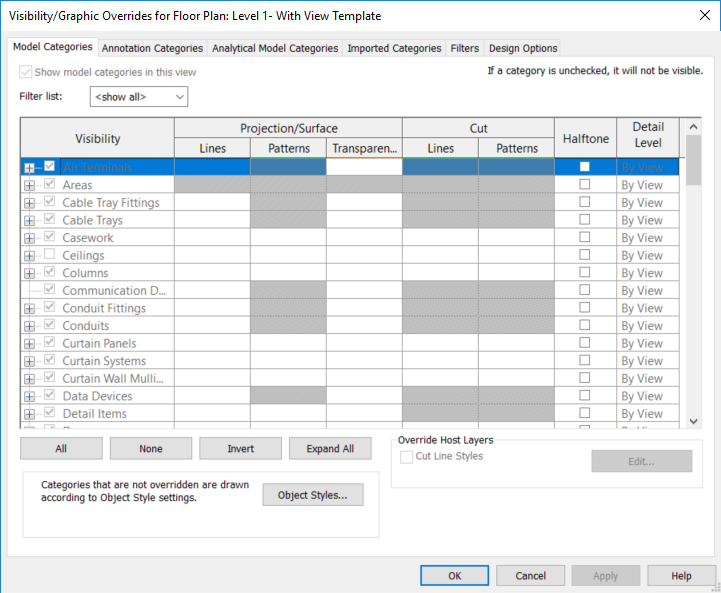
4.In the Assign View Template window that opens, select the Edit… button to the right of the V/G Overrides model parameter.

Note: Use the All button to save time. Click All, then click any Visibility Item checkbox to turn off every Visibility Item in the list. Then select None and individually select which Visibility Item to keep checked on.
You will have to repeat this process for every floor plan view in your file you plan to export.
Category Tab |
Visibility Item (checked on)
|
Model Categories |
•Casework (if the plan contains casework) •Columns •Curtain Panels •Curtain Systems •Doors •Electrical Fixtures, if applicable •Furniture, if applicable •Rooms •Stairs •Walls •Windows |
Annotation Categories |
•Grids •Room tags |
Analytical Model Categories |
None |
Imported Categories |
Uncheck anything you do not want in your background.
For example, sometimes a furniture .dwg file is linked in |
Filters |
None |
Worksets |
Make sure any that will apply to your project such as a DIRTT workset are set to Visible or Show (these mean the same thing) |
Revit Links
Note: This will only appear if there is a Revit file linked to the model. |
•Core •Shell •Architectural •Structural
Note: The names of the Revit Links may change depending on the project. |
5. Click Apply, then OK.
6. Click OK in the Assign View Template Window to apply your changes.
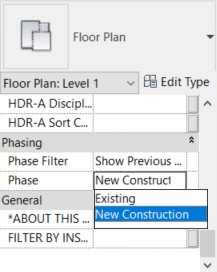
7. Scroll down to the Phasing subheading in your Properties Palette.
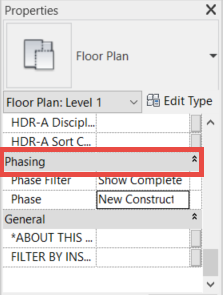
8.Set the Phase Filter to Show Complete or Show New + Previous. This Phase Filter will depend on the project. The architect should advise what phase and view the designer should be working in. Reference back to your project checklist for additional information.

9.Set the Phase (or the current phase of the project if the architect has these set up e.g. Phase 1) to New Construction. Selecting this option will show all new construction elements that are included in the scope.
10.Click the File tab once the floor plan looks ready.

11.Click Export.
12.Click CAD Formats. A list of available options will appear to the right.
13.Select DWG from the list of options.

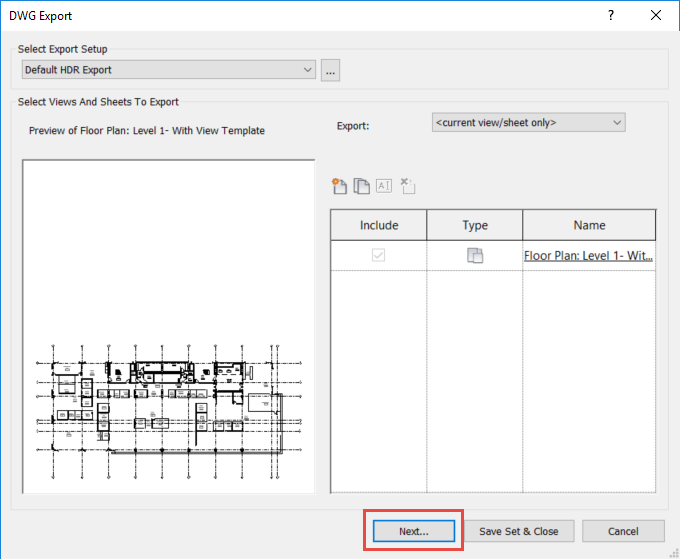
14. Click Next… in the DWG Export window.
15. Uncheck the Export views on sheets and link as external references checkbox in the Export CAD Formats window.
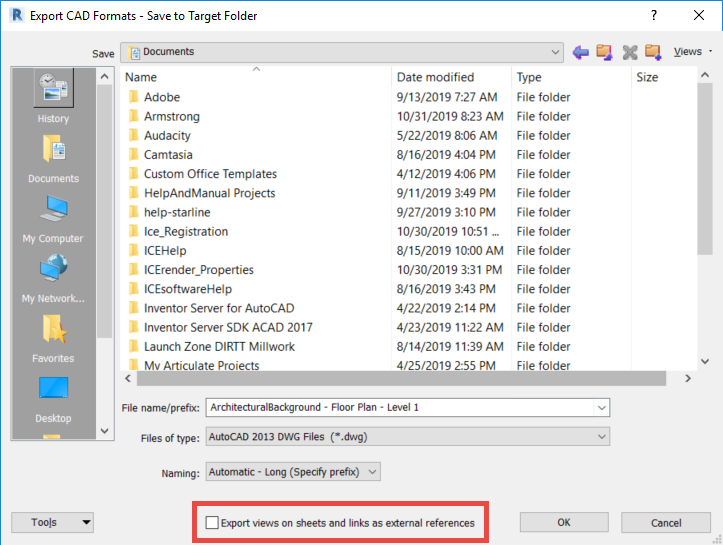
16. Give your DWG file a name and choose a file location.
17. Select AutoCAD 2013 DWG Files (or later) in the Files of type dropdown menu.
18. Click OK once complete.

19. Do not save the Revit file.
20. Complete steps 1-19 for each floor plan level.
Repeat this process for every floor plan view in your file you plan to export.
Related Links