Casework can only be placed into a plan by using the Stamp function.
Stamping Casework into a plan is just like stamping other items into a plan, but there are some tips. Stamp Casework away from other Casework items. This makes it easier for changing properties and finishes.
To stamp Casework into a plan:
1.Select the desired item from the Product Palette.
2.Stamp the item into the plan.
3.Make edits to Properties and Finishes.
4.Snap into place.
|
To rotate Casework after stamped into a plan:
1.Select the previously stamped item.
2.Select the Rotate button.
3.Drag to the desired location.
NOTE: It is best to have Confirm on for an accurate rotation.
To rotate Casework before stamping into a plan:
1.Select the desired item from the Product Palette.
2.Use the Keyboard Shortcuts.
3.Stamp the item into the plan.
|
Snapping units to other units allows Casework to come together and share product information and create valid product configurations.
To Snap Casework into a plan:
1.Select and hold the desired item.
2.Drag the item near a wall or other Casework.
3.The selected item will snap into place.
|
The handedness of units are predetermined in the Product Palette. Next to the name of each typical is LH (Left Hinged) or RH (Right Hinged). This means the side of the door where the hinges are located.
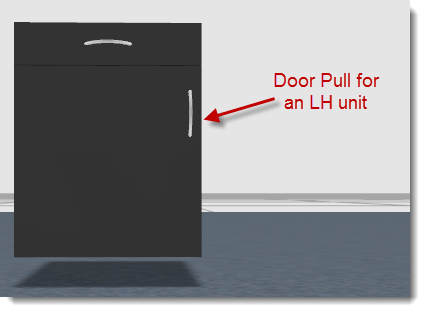
For example: In the 3D image below we have a Base 1 Door 1 Drawer LH Starter. Notice that the handle to the door is on the right-hand side, meaning as the door opens, it will swing to the left-hand side. This is an LH unit.
 Base 1 Door 1 Drawer LH Starter with a Black Chroma Coat Grade 1 - Standard Finish |
Created with Help & Manual 7 and styled with Premium Pack Version 3 © by EC Software

