ICEscapes allow you to add realistic background environments to your ICE file, which provide extra depth and customization to your design.
Turning on ICEscapes
Before using ICEscapes, you must first turn them on from the ICEscapes Settings menu. Open the ICEscapes Setting menu in one of the following ways:
1.Click Tools from the primary toolbar in ICE3D then select ICEscapes Settings... from the list of options.
2.Click ICEscapes Settings... from the secondary toolbar in ICE3D.
3.Press V on your keyboard when in ICE3D.
You can also use the ICEscapes Choices drop down arrow in the primary toolbar in ICE3D to turn ICEscapes on, without opening the ICEscapes Settings menu.

Once the ICEscapes Settings window is opened, enable ICEscapes using the following steps:
1.Click the right drop-down arrow at the top of the ICEscapes Settings window.
2.Select ICEscapes Allowed from the list of options.
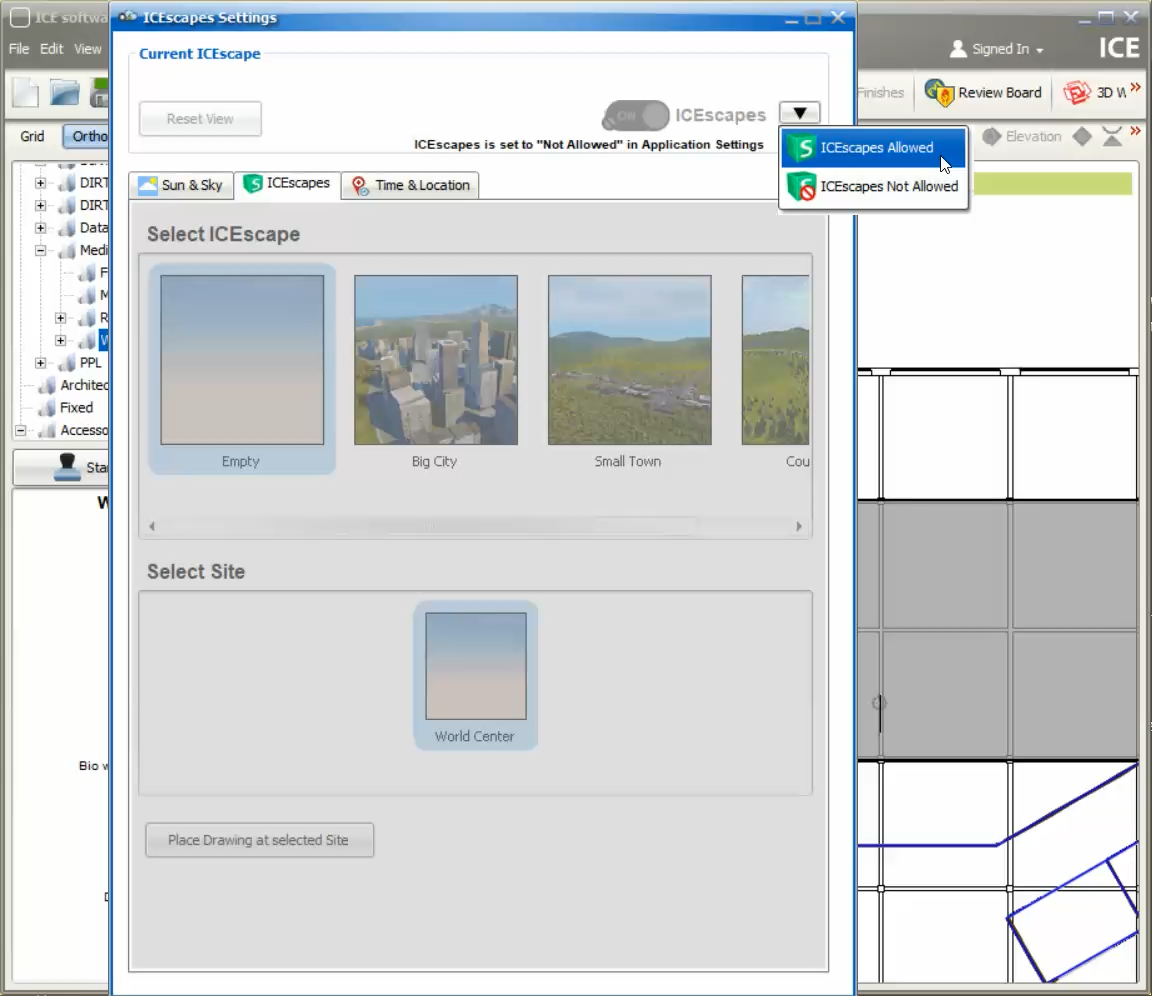
3.The toggle switch for ICEscapes will change from gray to green, allowing you to turn it on or off.
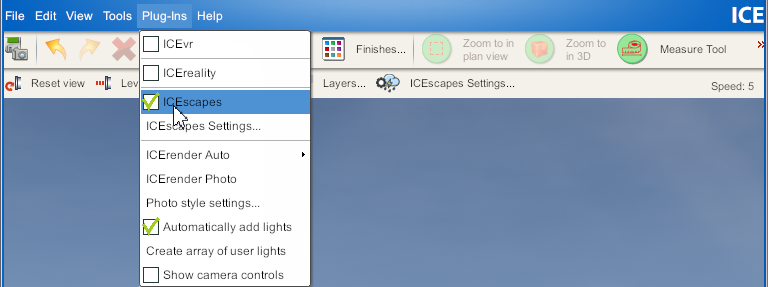
Allow ICEscapes can also be turned on from Application Settings. Or, click Plug-Ins from the menu bar in ICE3D and use the checkbox beside ICEscapes to turn this function on or off.
Within the ICEscapes Settings window, there are 3 tabs that allow you to control the settings of the background environment in ICE3D.
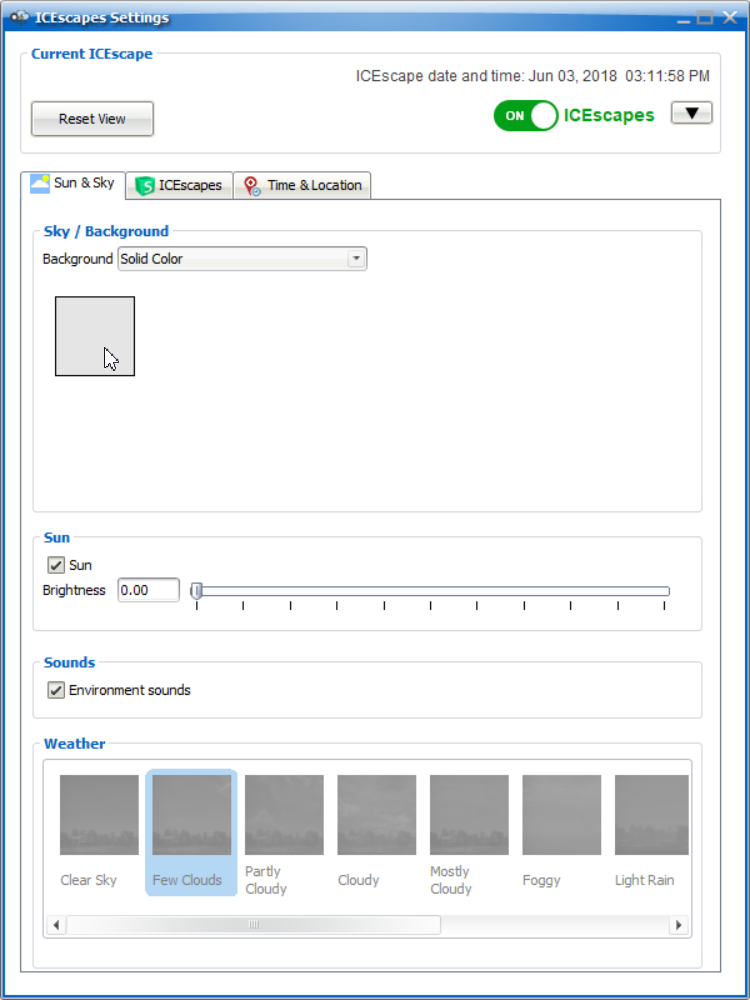
Sky/Background
Use the Background drop-down to select one of the following choices.
•Solid Color: Double-click on the square to choose a color from a Swatch or input HSV, HSL, RGB or CMYK values.
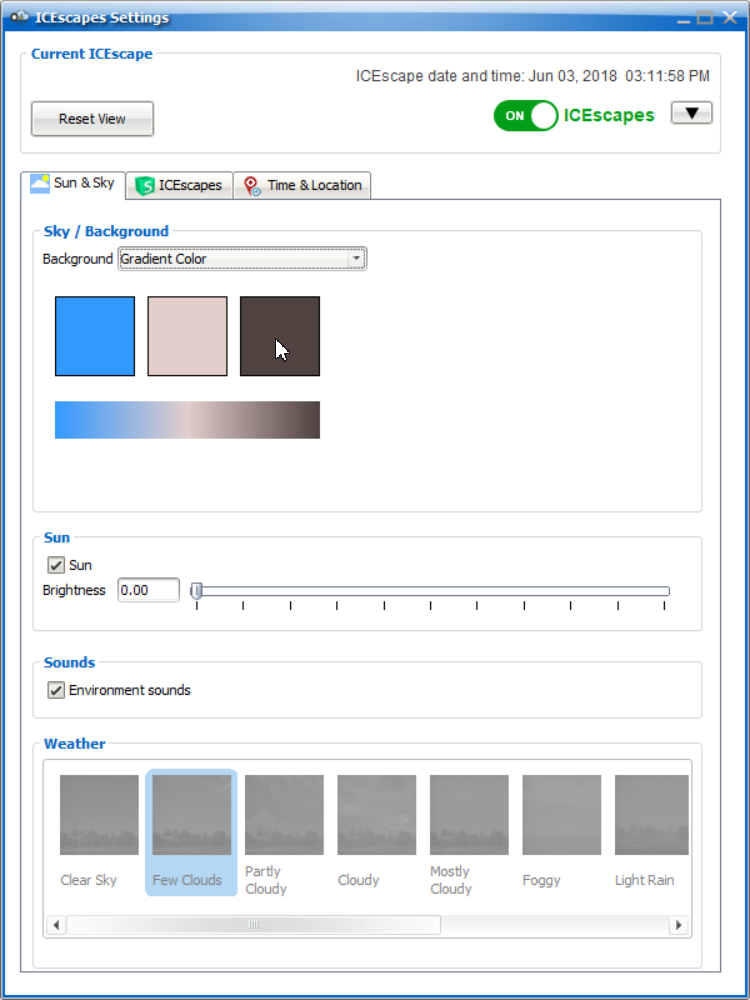
•Gradient Color: Double-click on each of the 3 squares to choose colors from a Swatch or input HSV, HSL, RGB or CMYK values.
•Static Image: Select one of the 7 predefined images from the drop-down menu to the right. You can also select the Choose your own option to upload a custom image. To do this:
o Click Browse...
o Navigate to where your image is stored. JPG and PNG formats are supported.
oClick Open.

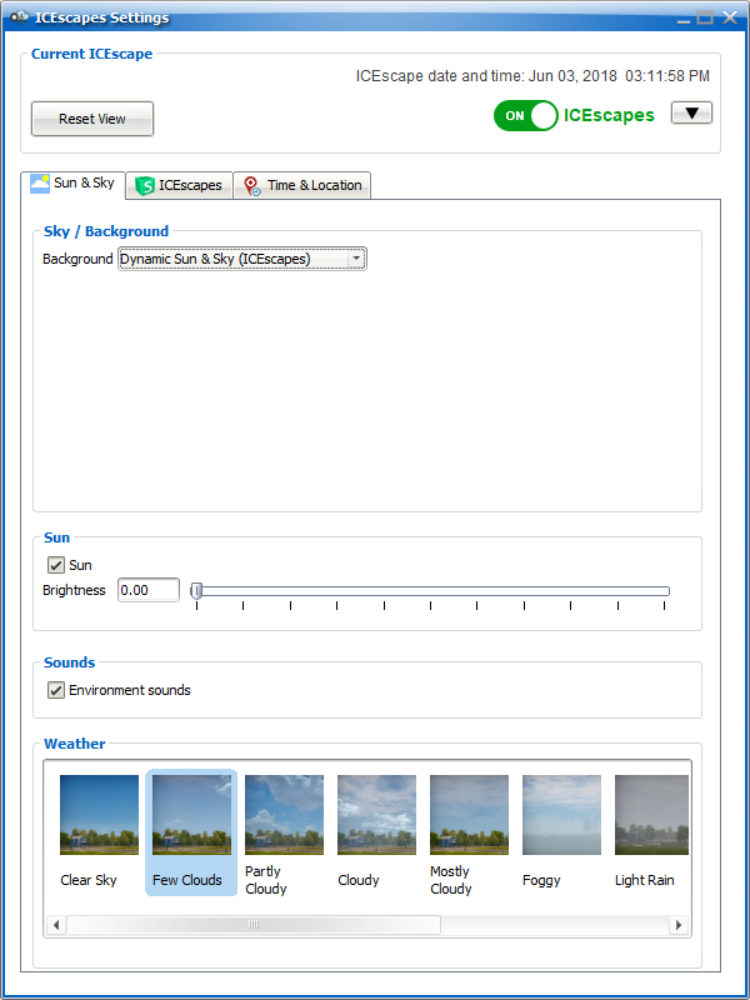
•Dynamic Sun & Sky (ICEscapes): Selecting this option will allow you to select different Weather patterns (see below).
Sun
Use the Sun checkbox to turn the sun on or off in your ICEscape. Adjust the Brightness by entering a value in the text field, or drag the slider to the right.

Sounds
Use the Environment sounds checkbox to include or exclude sounds from the selected environment in your ICEscape.

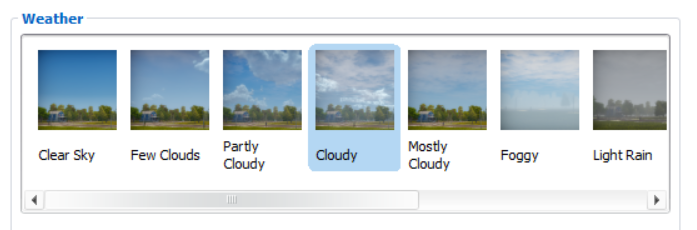
Weather
This options in this section will only be available to select if the Sky/Background is set to Dynamic Sun & Sky (ICEscapes) (see above). Once available, select a weather pattern that suits your liking.
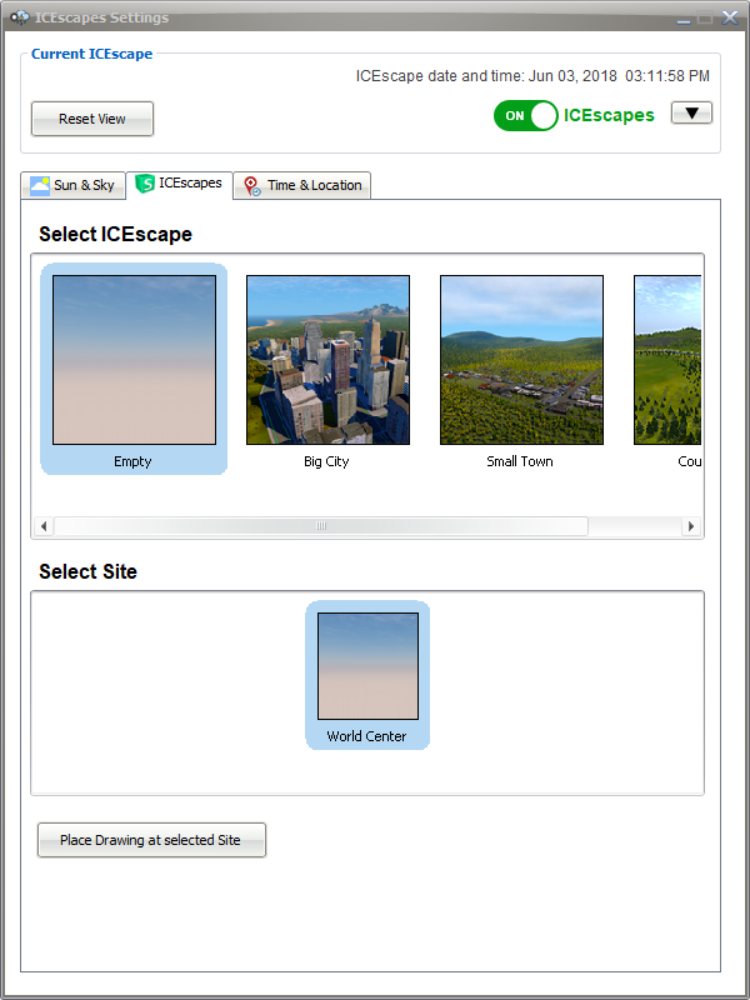
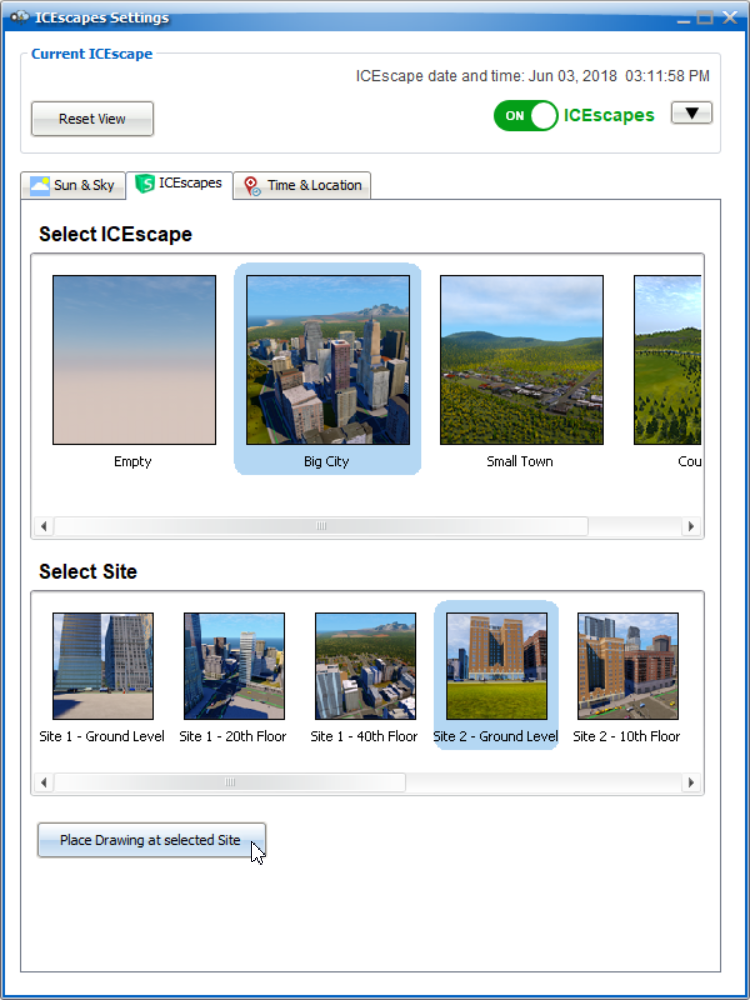
Select ICEscape
Select one of the available ICEscapes to enhance the background environment of your design:
•Empty: No ICEscape will appear with this option selected.
•Big City: A downtown urban environment with skyscrapers, cars, streetlights and people.
•Small Town: A smaller town square with grass, trees, cars, medium-size buildings and a water tower.
•Countryside: A natural open space with grass, trees, hills and a river.
Select Site
Each ICEscape provides options for different Sites around the ICEscape and different Levels that will change the height of your camera and floor. Once you select a suitable Site, click Place Drawing at Selected Site to apply the changes.
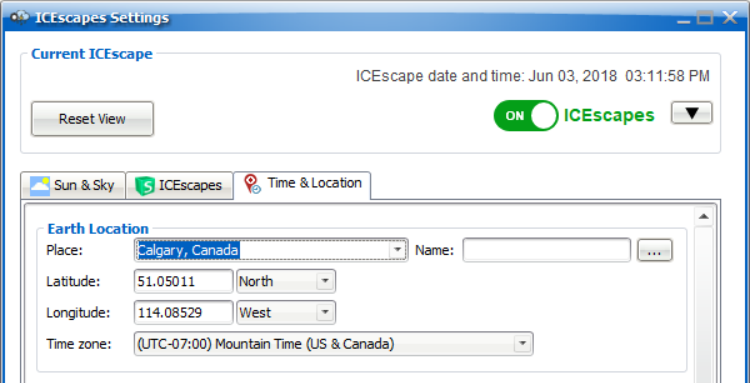
Earth Location
•Place: Use the drop down menu or beginning typing a location name to alphabetically look up a global location from a predetermined list.
•Name: This field will appear when a Custom location is created by adjusting the other fields in this section. Enter a name for your new location and click the ... to add the location to the Place drop down.
•Latitude: Enter your latitude coordinates in the text field, then use the drop down menu set the Latitude as North or South.
•Longitude: Enter your longitude coordinates in the text field, then use the drop down menu set the Longitude as East or West.
•Time Zone: Select one of the Coordinated Universal Time zones from the list of options in the drop down menu.
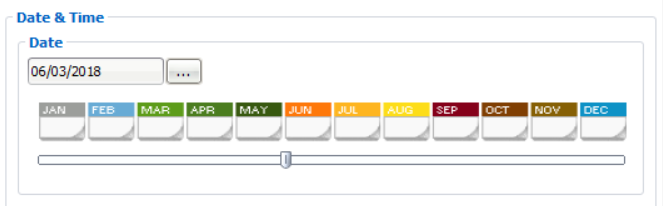
Date
Click the ... button to bring up the calendar widget to select a date. Alternatively, drag the slider below to change the date.
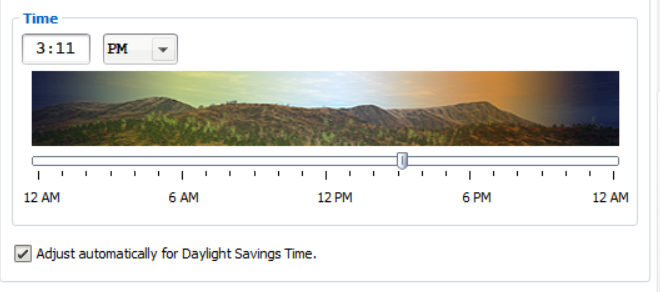
Time
Enter a time in the text field, then use the drop down to the right to specify whether the time is AM or PM. You can also use the slider below to set the time.
Use the Adjust automatically for Daylight Savings Time checkbox if you want the time to take Daylight Savings Time into account.
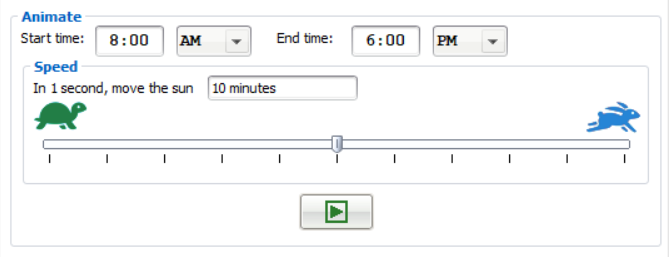
Animate
Use the Animate feature to simulate the passage of time in a day, which allows you to see how your design looks at different times of the day. To use this feature:
1.Set your Start time and End time by entering a time in the appropriate text field, then using the drop down menu for each time to specify whether it is AM or PM.
2.In the Speed section, enter a number in the text field for the rate you want the sun to move at, followed by the suffix seconds, minutes or hours. Alternatively, drag the slider below towards the rabbit or turtle to increase or decrease speed, respectively.
3.Press the Play button to start the animation.