Before you start using Edgewall, review these best practices. These suggestions are designed to set you up for success when using Edgewall.
Before you place your i-Line with Edgewall, you will be able to change the i-Line justification. Therefore, decide which edge of the DXF/DWG line you want your i-Line to line up with and which side of your i-Line will line up with this edge.
This example image shows the i-Line before using offset. The blue-dotted line, representing one side of the i-Line, lines up with the edge of the DXF/DWG line, and the i-Line faces inward:

This example image shows the same i-Line after using the offset function. The i-Line now faces out, and the green-dotted line, the opposite side of the i-Line, lines up with the DXF/DWF line:

Before you place your i-Line with Edgewall, you will be able to rotate it 180 degrees. Therefore, you should decide which edge of the DXF/DWG line you want your i-Line to appear on.
This example image shows the i-Line before using the rotate 180 function. The blue-dotted line, representing one side of the i-Line, lines up with the edge of the DXF/DWG line, and the i-Line faces inward:

This example image shows the i-Line after using the rotate 180 function. The i-Line now faces out, and the blue-dotted line still lines up with the edge of the DXF/DWF line:

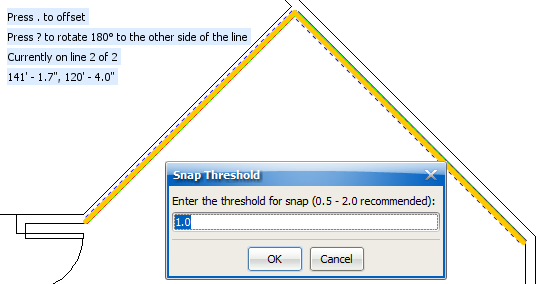
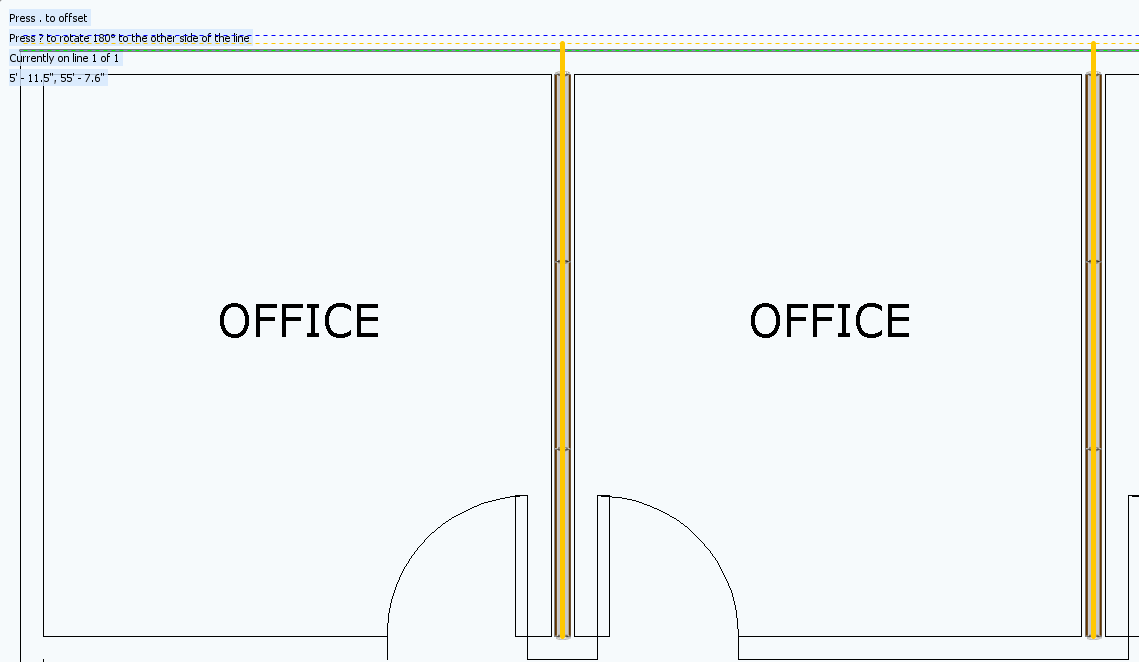
When you use Edgewall on multiple DXF/DWG lines, close i-Lines extend or retract to meet each other and snap together. Before you place these i-Lines, Edgewall previews the connection. The i-Lines become solid yellow lines.
If your proximate i-Lines do not snap, you may have to adjust the snap strength. The default snap strength of 1.0 will work for most close i-Lines. However, you may have to adjust these values. If proximate i-Lines do not snap with Edgewall, you may have to adjust the snap strength.

i-Lines that you place with Edgewall can extend or retract to snap to existing i-Lines. In other words, Edgewall i-Lines do not have to be touching proximate i-Lines to snap. They just have to be close enough. Other i-Lines may be other i-Lines you are adding with Edgewall, i-Lines you drew, or i-Lines you already placed with Instawall/Center Wall/Edgewall. In some cases, you may have to adjust the Snap Strength for Edgewall i-Lines to extend and snap.
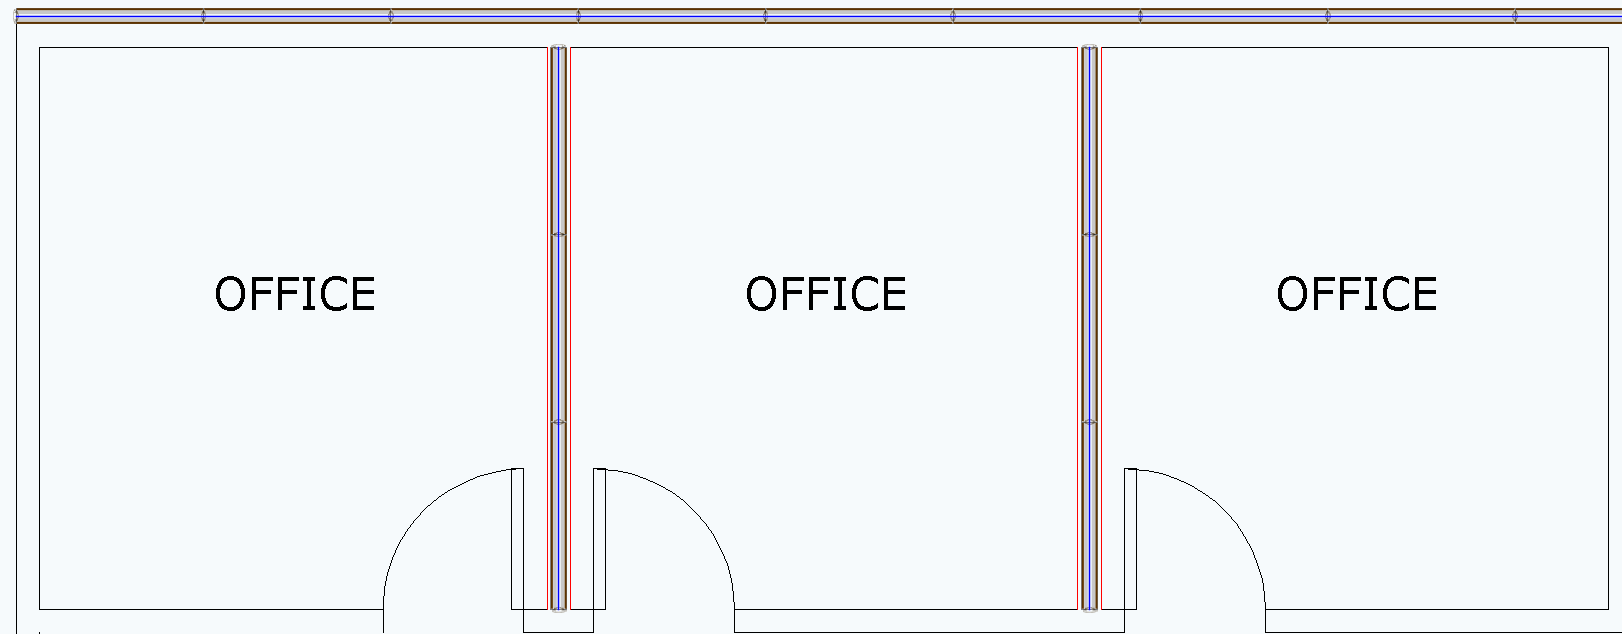
If you want your Edgewall i-Lines to extend/retract and snap to close i-Lines , you must consider the order in which you place the i-Lines. For example, if you use Edgewall to place an i-Line on a DXF/DWG line, and then use Center Wall to add some intersecting lines that do not quite intersect, the i-Lines will not snap together. You will then have to manually extend the Center Wall i-Lines and snap them to the Edgewall i-Line. In this example photo, we used Edgewall to place the horizontal i-Line, and then we used Center Wall to create two vertical i-Lines. Since the i-Lines do not touch, they did not snap together:

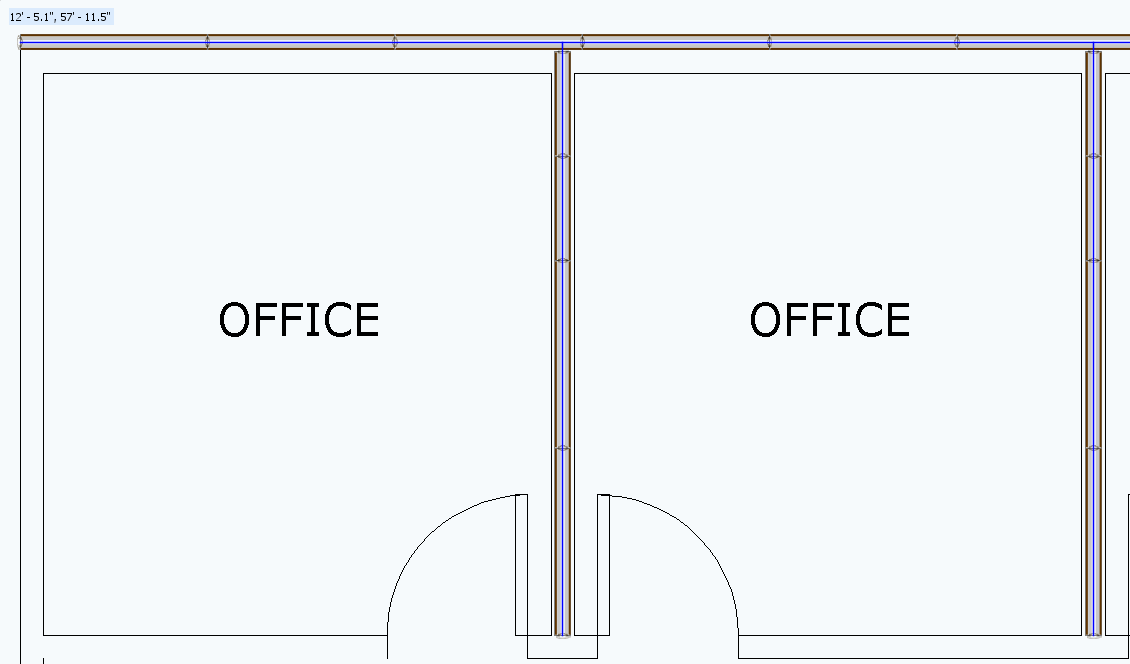
However, if you do Center Wall and then Edgewall, the lines should snap. Edgewall detects close intersecting i-Lines, and these either extend or retract to snap to the Edgewall i-Lines. In this example image, we first used Center Wall to place the vertical i-Lines, and then we created the horizontal i-Line with Edgewall. The i-Lines extend to meet each other and snap.


Order matters. However, the order you use will vary on a case by case basis. Before you use Edgewall with Instawall, Center Wall, and other i-Lines, consider the order of operations. If you want intersecting i-Lines to snap, ask yourself the following question: Which tool should I use first so that my lines will snap?