The Scenes function allows you to create and edit fly through views of your ICE design file in ICE3D.
Open the Scenes window in ICE3D in one of the following ways:
1.From the Tools menu, select Scenes... from the list of options.

2.Click the Scenes... button in the primary toolbar.

3.Press B on your keyboard.
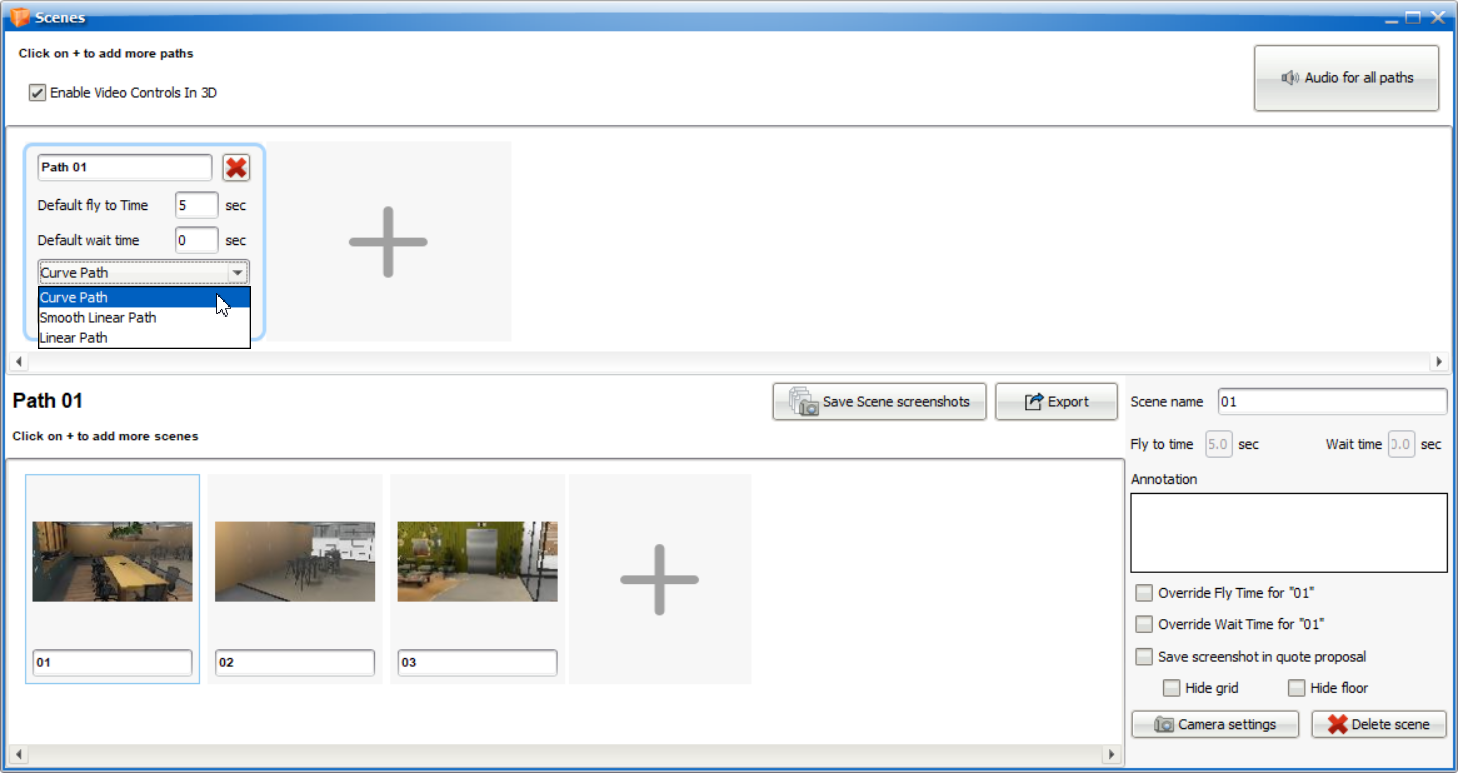
Once the Scenes window is open, set up a path by following the steps below:
1.Rename the Path by entering a path name in the text field at the top of the dialog box.

2.Adjust the Default fly to Time and Default wait time by entering a number in the respective number fields.

3.Select the shape of the path using the drop down menu. Options include:
a.Curve Path
b.Smooth Linear Path
c.Linear Path
4.Use the Play button to start the path.
5.Use the drop down menu beside the Play button to adjust the path's settings. Use the checkboxes to turn the settings on or off, which include:
a.Repeat Continually: Play the path on a continuous loop.
b.Play in Reverse: Play the path in reverse order.
c.Ping pong play: Continually play the path from start to finish, followed by reverse order.
d.Show annotations: Display a scene's annotated text on screen.
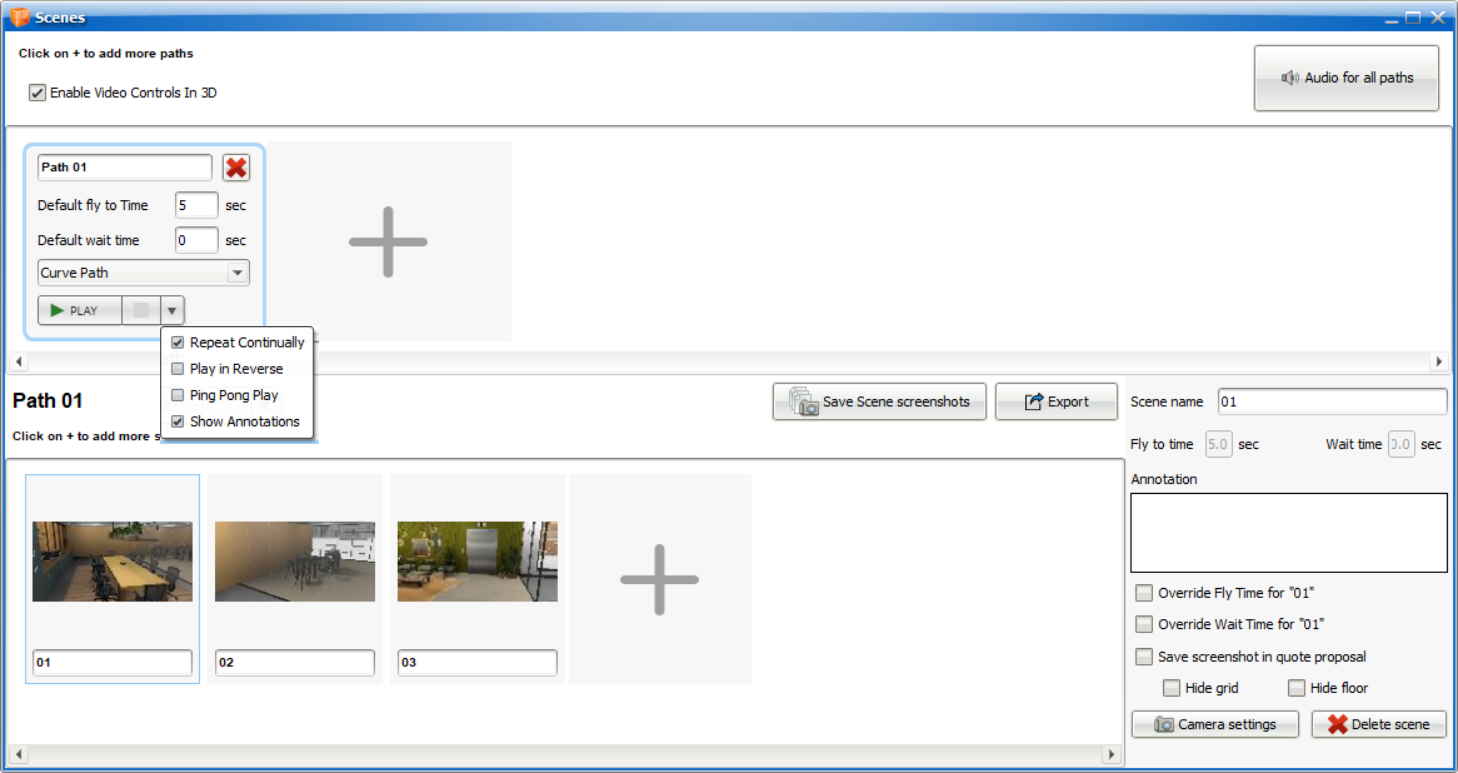
6.Click the red Delete button to delete all scenes contained in the path.
7.To add additional paths, click the Plus (Create New Path) button to the right.
Once the path is set up, add scenes to it by doing the following:
1.In ICE3D, navigate to a spot in your design file you want to showcase. This will be where the path begins.
2.In the Scenes window, click the Plus (Add Scene) button at the bottom of the window. The scene will be created from wherever your camera is position in ICE3D.
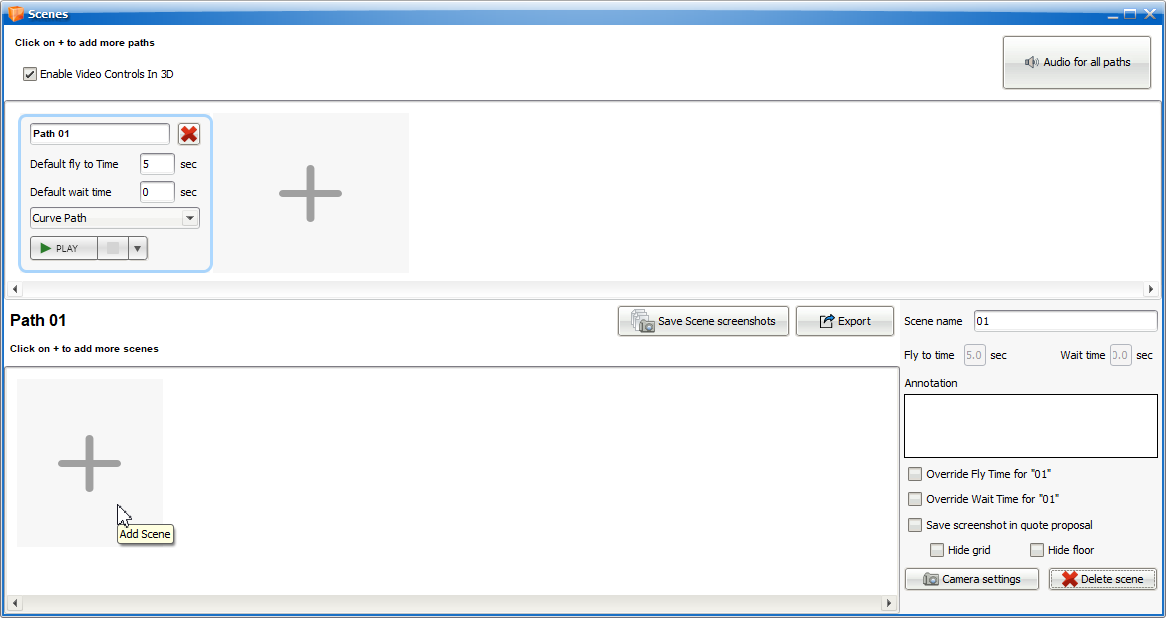
3.Navigate to other spots in your file and repeat steps 1-2 to add additional scenes to your path. Multiple scenes can be included in a path.
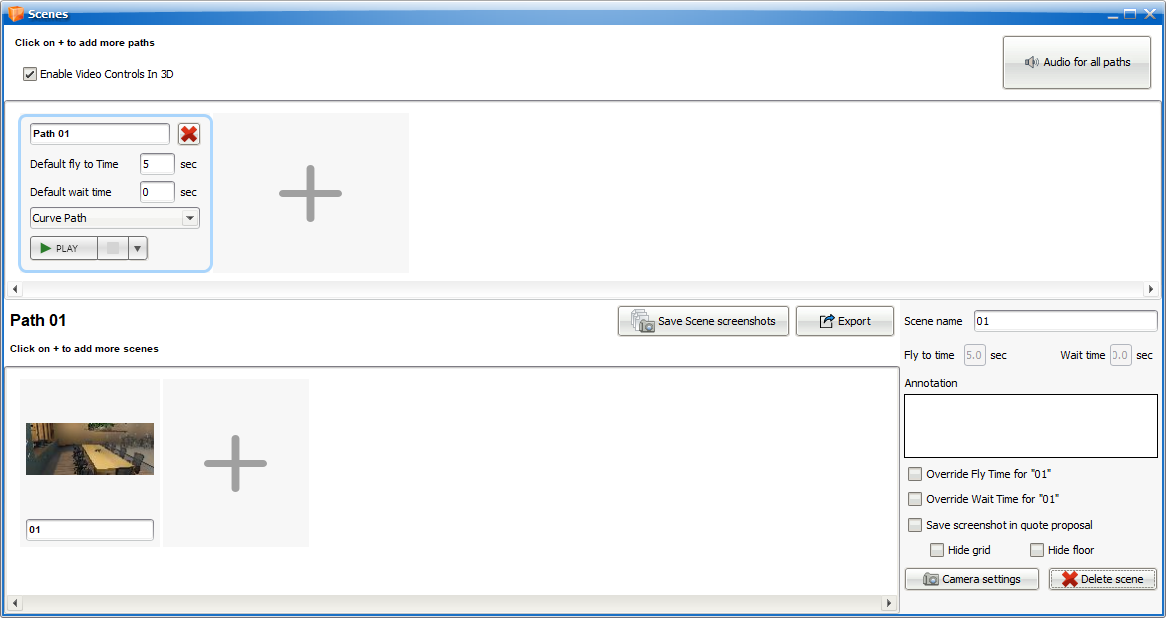
4.Click and drag scenes to re-order them in the path.
Edit the scenes within the path using these steps:
1.Edit the Scene Name by entering a new name in the text field.

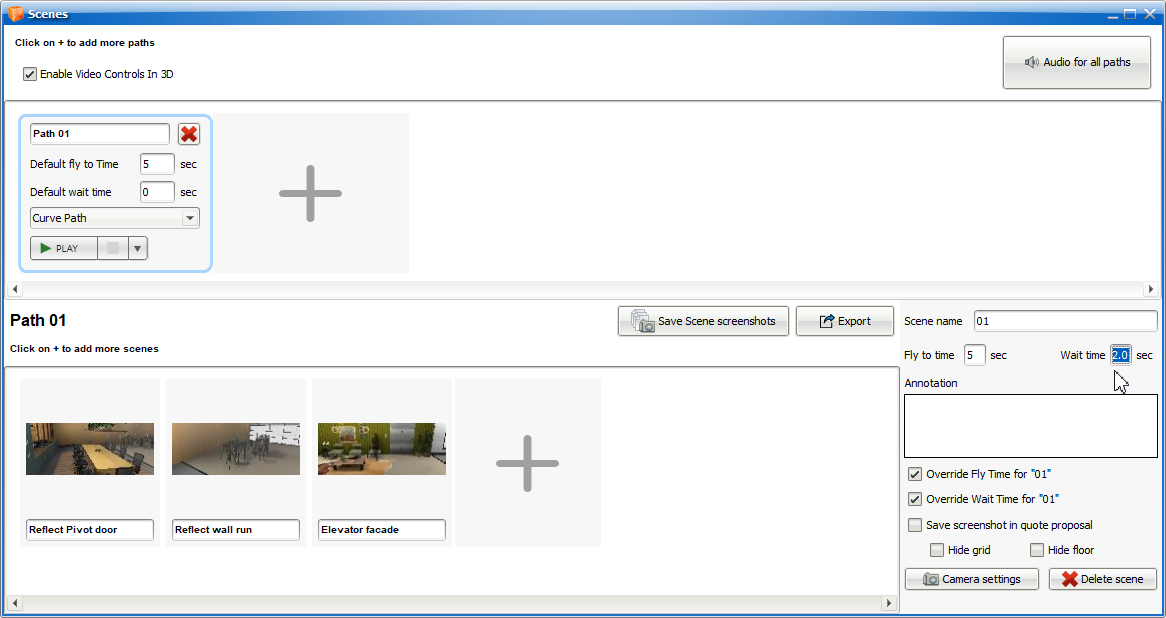
2.Add a custom Fly to time by turning the Override Fly Time for "[Scene Name]" checkbox on and entering a new time in the Fly to time number field.
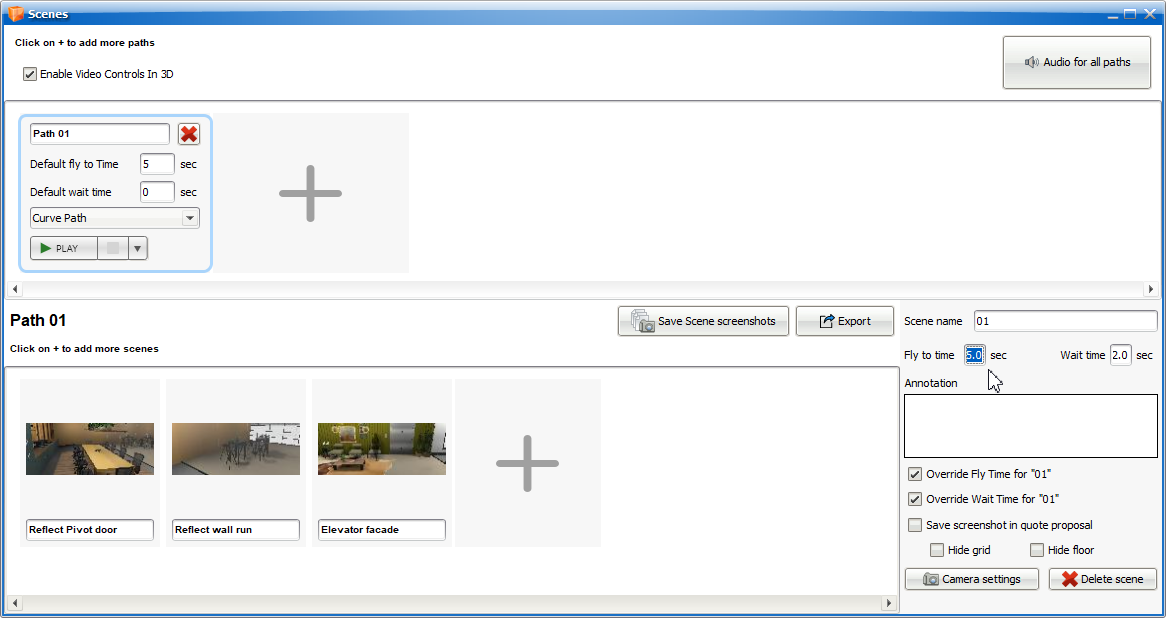
3.Add a custom Wait time by turning the Override Wait Time for "[Scene Name]" checkbox on and entering a new time in the Wait time number field.
4.Add annotated text in the Annotation text field. When the Show Annotations checkbox is turned on for the path, any annotated text for a scene will appear on screen.
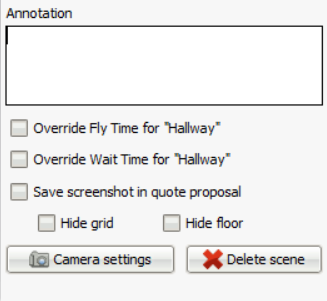
5.Turn the Show screenshot in quote proposal checkbox on to include a screen capture of the selected scene in your quote.
6.Use the Hide grid and Hide floor checkboxes to show or hide the grid and floor in your path.
7.Click the Camera settings button to bring up the camera controls in ICE3D. Adjust the Focus, Depth of Field and Field of view for the selected scene.
8.Click the Delete scene button to remove a selected scene from the path.
Once you have your path and scenes set up, save or export the path in one of the following ways:
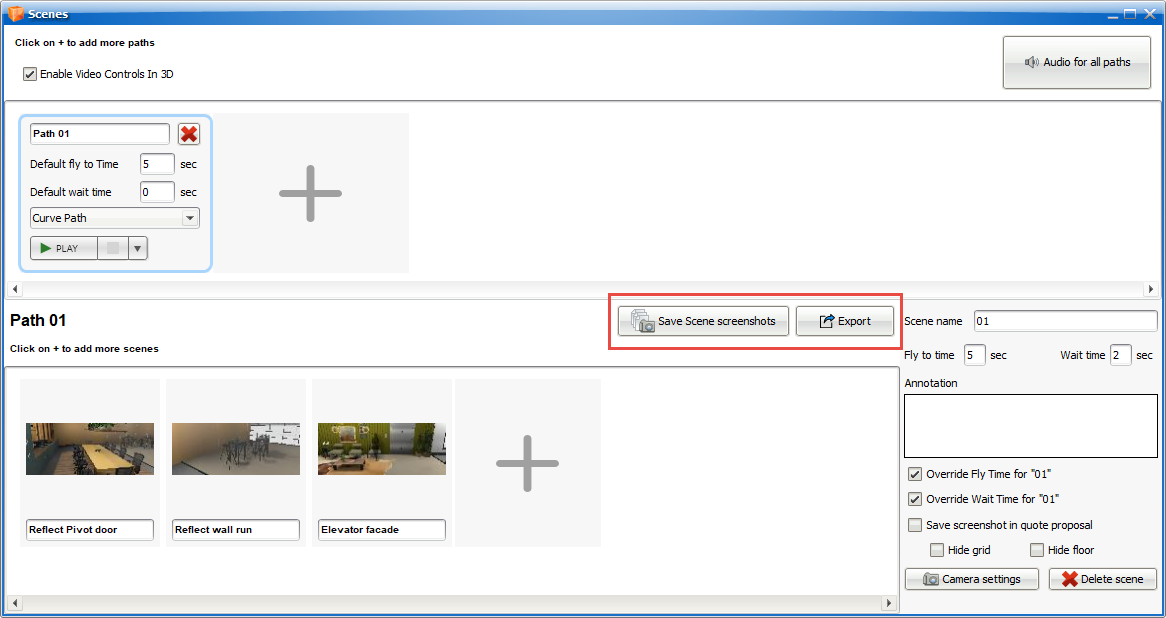
1.Click the Save scene screenshots button above the scenes to save images of the scenes in the path.
a.Choose a file location and click Open.
b.Select a Resolution from the drop down menu, or enter Width and Height dimensions in the respective number fields.
c.Use the Hide grid and Hide floor checkboxes to show or hide the grid and floor in your screenshots.
d.Click OK to finish the process or Cancel to stop the save process.
2.Click the Export button to export a video of the path to mp4 format.
a.Select a resolution from the list that appears.
b.Enter a File Name and choose a location to save the video to. Click Save to finish the process.