Elevations can be created to import into AutoCAD and edit properties and finishes. You can even create single elevations.
To create elevations:
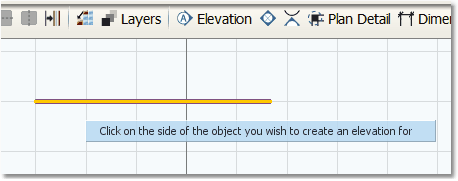
1.Select a wall in the plan, then click the Create Elevation button in the top tool bar.

2.Then click on the side of the object where you wish to create an elevation.
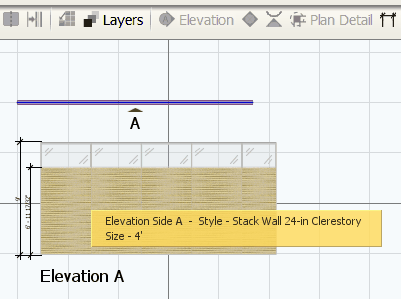
3.The Elevations will show the dimensions of all the extrusions on the wall and the finishes of the tiles. They will also label the wall in the plan with an elevation marker.
4.Tiles can be selected from the Elevation picture and have the finish changed in the Finishes Editor.
**This way of changing finishes should be reserved for presentations and exploring options with clients. When a file is submitted as an order, the styles in the plan should have a style in the Product Pallet that matches.**
To delete an elevation, select it and press delete on the key board. Sometimes the dimension lines will remain on the screen. If this happens, right-click and choose Refresh drawing.
When working in the plan, the elevations will automatically update to show any changes made to size or finish.