Camera Filters allow you to change the appearance of objects by using a filter, rather than changing the finish of the object itself.
To use a Camera Filter:
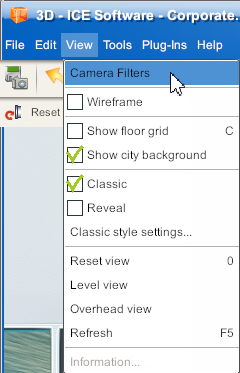
1.Click View from the primary toolbar, then select Camera Filters from the list of options. Alternatively, click the Camera Filters icon from the secondary toolbar.


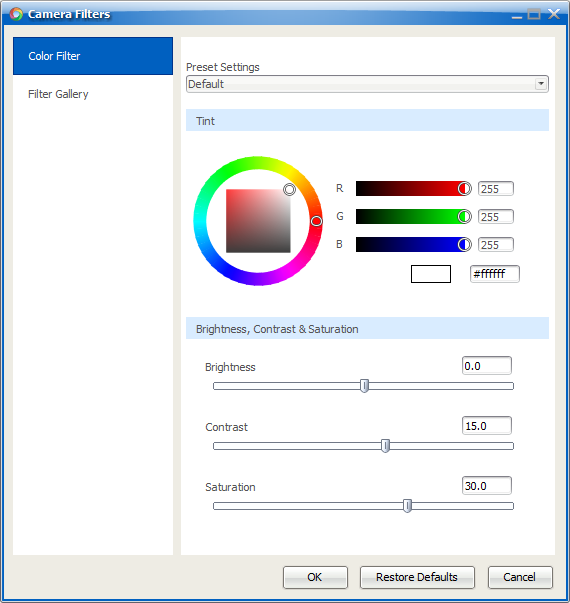
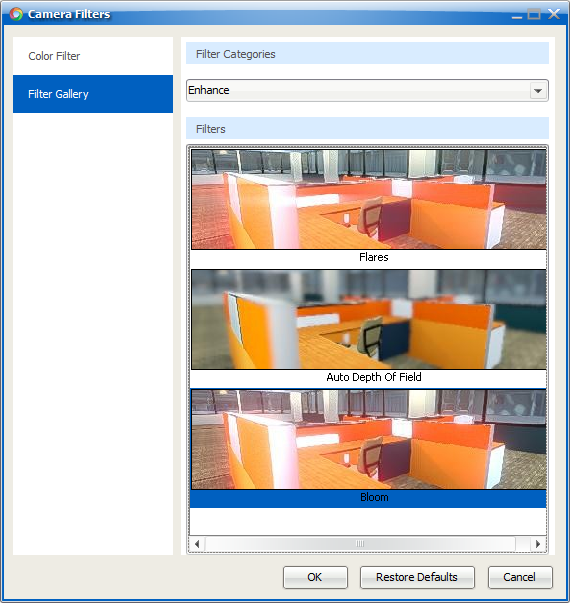
2.The Camera Filters dialog will open. There will be two tabs on the left-hand side: Color Filter and Filter Gallery.
3.In the Color Filter tab:
a.Use the Preset Settings drop down menu to select an color filter option with preset values.
b.Or, create a Custom color filter by experimenting with the RGB sliders/entering a Hex code and adjusting the Brightness, Contrast and Saturation sliders.
c.Click OK to apply the color filter.
d.A warning message will appear explaining that this affects the camera view only and may impact how finishes are displayed. Click OK to finish applying the filter. A header message will also appear in ICE3D explaining the same thing.
e.Click the Restore Defaults button in the Camera Filters dialog window to remove the color filter from the camera.
f.Click Cancel at any time to discard your filter changes. If you already had a filter applied, ICE3D will revert to this previous filter.
4.
5.In the Filter Gallery tab:
a.Use the Filter Categories drop down to select a specific category.
b.Click on a Filter from the list of options to apply it. Some categories may only contain one filter option.
c.Click OK to close the Filter Gallery.
d.A warning message will appear explaining that this affects the camera view only and may impact how finishes are displayed. Click OK to finish applying the filter. A header message will also appear in ICE3D explaining the same thing.
e.Click the Restore Defaults button in the Camera Filters dialog window to remove the color filter from the camera.
f.Click Cancel at any time to discard your filter changes. If you already had a filter applied, ICE3D will revert to this previous filter.
