1.Add the required DIRTT Flex Gas components to your wall module or i-Line.
2.Select the wall module or i-Line.

3.Right-click, and open the Properties Editor.
4.Under Select the objects to edit, select Wall Modules.
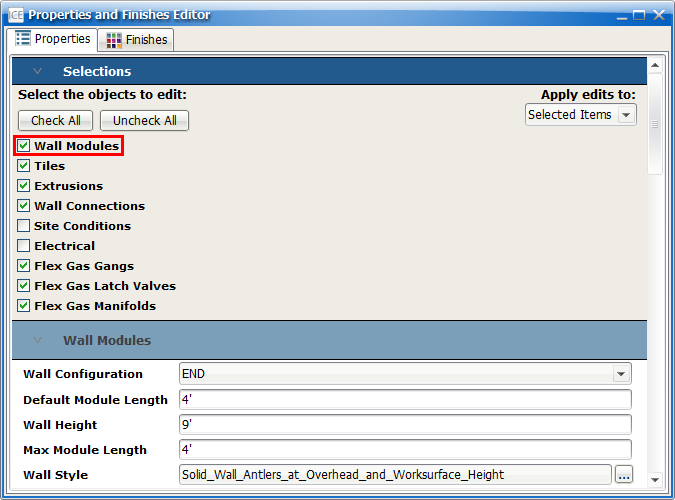
5.Under Horizontal Pass-through Preps, select the number of horizontal pass-through preps that the wall module requires (0-4).
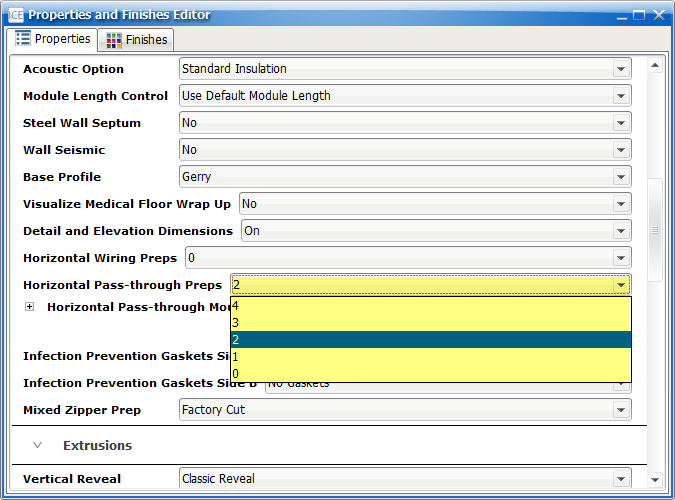
Note: If you specify more than two Horizontal Pass-through Preps in a wall frame, Notification 2700 will appearing, indicating that the file needs to be manually reviewed.
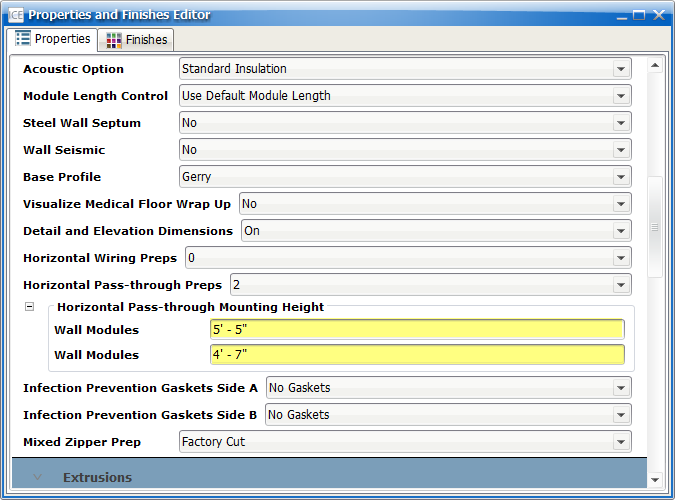
6.If you specify more than two Horizontal Pass-through Preps per frame, the Horizontal Pass-through Mounting Height option appears, allowing you to adjust the height of each prep. Adjust the value in the Wall Modules fields to change the Horizontal Pass-through prep height (if required).
7.To audit Horizontal Pass-through Preps for a layout, insert elevations.
8.Then, go to the View menu, and select Show Horizontal Pass-through Audit.

|
