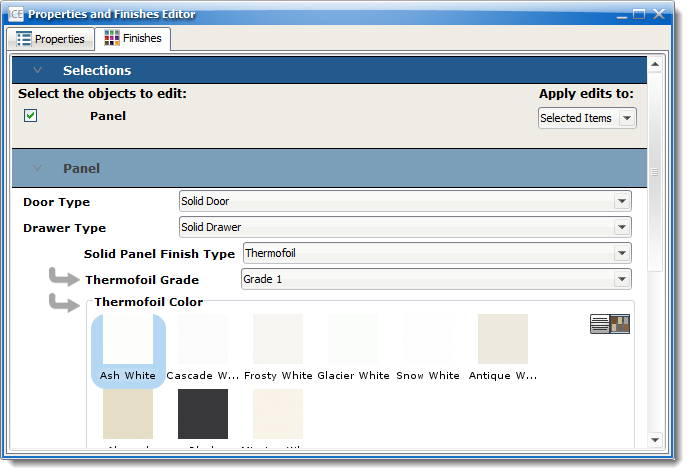
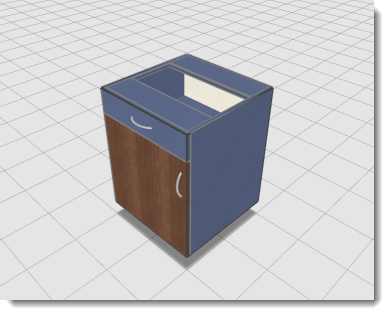
Finishes can be applied to entire cabinets, selected components or glass doors and drawers. There are multiple ways to access the Finishes Editor. Being able to select a single component allows multiple finishes on a single unit.
Accessing the Finishes Editor from 2D is best for changing a finish for an entire Casework cabinet. This includes shelves inside of the cabinet. If shelves require a different finish, select them in the Casework Editor and change them to the correct finish.
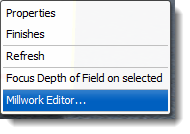
1.Highlight the Casework component in 2D plan view.
2.Right-click and select Finishes.
3.Change finishes to the selected components.
|
Accessing the Finishes Editor in the 3D window is useful when selecting Casework components, such as sides, doors, and drawers. With a second click on a unit, you can select only fronts to set a finish. When using Ctrl+click, you to change multiple fronts and leave other components with different finishes.
1.Highlight the Casework component from the 3D window.
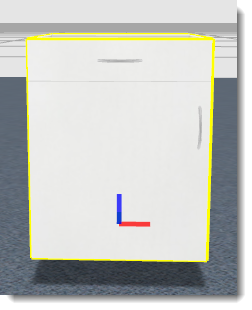
2.Right-click and select Finishes.
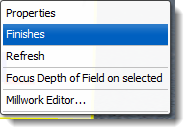
3.Change finishes to the selected components.
4.Press Enter after making a change for it to take effect. |
Accessing the Finishes Editor in the Casework Editor is useful for changing finishes to an entire cabinet or a single component.
NOTE: The Casework Editor does not allow you to make multiple selections with the Ctrl+click.
1.Highlight the Casework in the the 2D plan view or from the 3D window.
2.Right-click and select Casework Editor.
3.Select the Casework Component.

4.Select the Finishes Button from the Casework Editor.
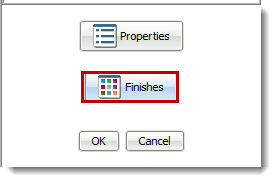
5.Change finishes to the selected component.
6.Press Enter after making a change for it to take effect.
|
NOTE: When a finish is applied only to one side, Low Pressure Laminate Low Pressure Laminate (LPL) comes as part of the sub-straight from the manufacturer. There are two finish options for LPL, black or white. If the cabinet is open or does not have doors, like a Base Open Cabinet, you might want to select a more appropriate finish for the back. This is because the inside of the cabinet will be visible.
When LPL is specified, the user can choose the side A or B of a panel that has the LPL finish. (LPL) will be on the opposite side. This prevents the finish from warping.
